Learn how to colorize icons with your NounPro subscription and Adobe Illustrator.
For those who want to level up their black and white Noun Project icons with a splash of color, unlocking the power of a NounPro subscription and Adobe Illustrator offers robust options for customization.
A NounPro account allows you to instantly change the color of an icon directly on the Noun Project site or via the Noun Project Mac App. When you select an icon, beneath the icon you’ll see the option to change the foreground color (the “fill” of the shape which by default will be black) as well as the background color (which by default is transparent). For changing the icon color and background color, you can select a color from the provided palette of options, or select the “Custom Color” option to add a HEX value of your choice. You can even rotate your chosen icon and add a background shape, such as a circle, ring, or rounded rectangle.
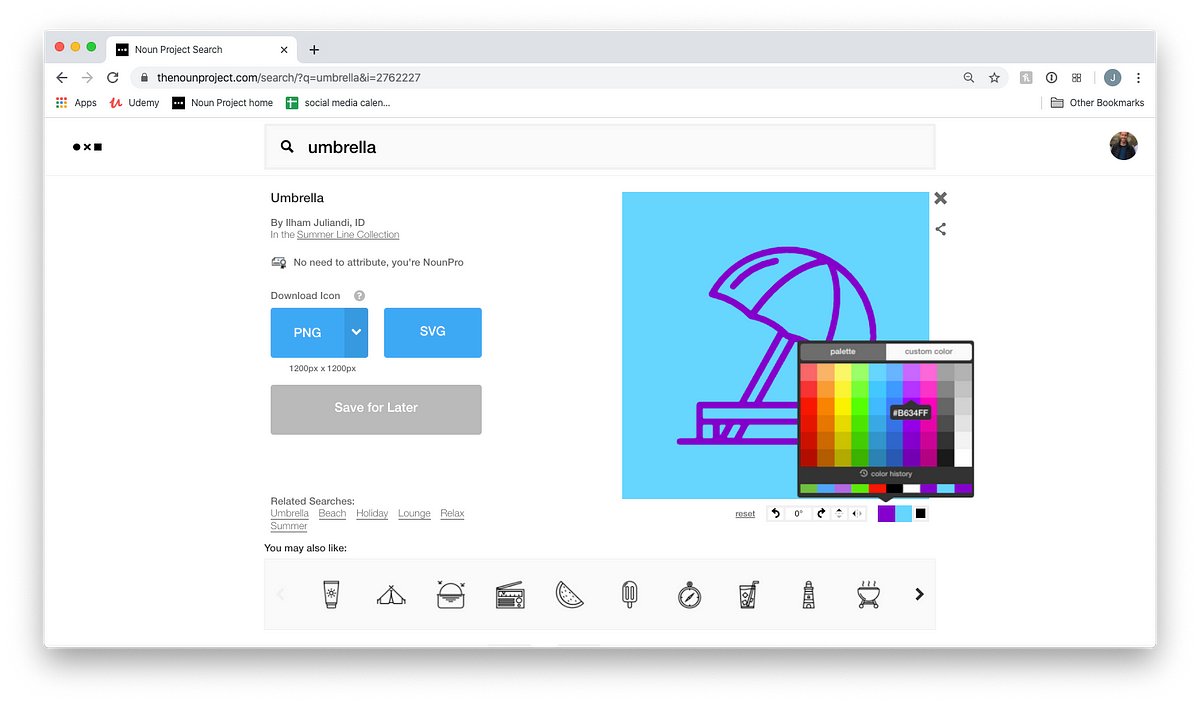
With a NounPro account, a full suite of customization options including color, rotation, and shape let you personalize every icon.
Once you’ve set your color and shape preferences, you’ll find that they’ll apply to every new icon you pull up to download unless you change them. This is a handy hack that will allow you to quickly add several new icons to a project where you want all of the icons you’re using to be uniform, without having to edit each icon individually.
In certain cases, you may want to fill in icons with multiple colors or customize them even more. A design tool like Adobe Illustrator CC will let you quickly and easily work with these vector shapes, and with Noun Project’s Adobe Add-On, you can drag-and-drop icons straight onto your Illustrator artboard without having to leave your workflow.
Download the Noun Project Add-On for Adobe and Color with Live Paint in Adobe Illustrator
First, download the Noun Project Add-On for Adobe and launch Illustrator.
Next, start a new document. You can use any of Adobe’s provided templates, or build your own based on what you might want to create.
Note: For digital art, make sure the “Color Mode” under “PRESET DETAILS” is set to RGB Color, and the Raster Effects (resolution) is set to “Screen (72 ppi).” For this example, we’ve used their “Common” template for web, 1366 x 786 px.

Then, navigate to Window > Extensions > Noun Project to launch the Noun Project extension window. It works just like Noun Project’s Mac App, and if you’re a NounPro subscriber you will have access to unlimited icons and the same customization tools.
In the Noun Project extension window, enter a search term for your icon and click “enter” (for this example, we’re using Umbrella icon by Ilham Juliandi). Find an icon that you like, and while hovering your cursor over the icon, click the black “Insert” prompt and the icon will appear on your artboard.
Because we’re working with vectors, the size of the icon won’t matter and you can scale it up or down as much as you want without losing resolution. Be sure to use the Selection Tool (“V,” the black cursor) to move and scale the icon, rather than Direct Selection (“A”). A square bounding box should appear when you click your icon, and you can then drag the corners of the box in or out (while holding Shift) to scale proportionally.
Create Colorable Regions of Your Icon with Live Paint
The Live Paint button (K) will automatically identify closed shapes (like the white spaces within your icon) and individually color them as you click. Make sure that the entire icon is selected (with V) and go to Object > Live Paint > Create. This will help Illustrator recognize all the shapes within your object as areas that can be colored.
Before you hit Live Paint (K), go to Windows > Colors, or find the paint palette icon on the right-hand toolbar to make sure your Colors window is open. There are several ways to manually pick a color from here — from the whole RBG Spectrum window, or the individual RBG sliders. When you’ve selected the color you’d like to use first, while in Live Paint mode, you can hover over a region of your icon that will flash with an outline so you know it can be colored, then simply click!
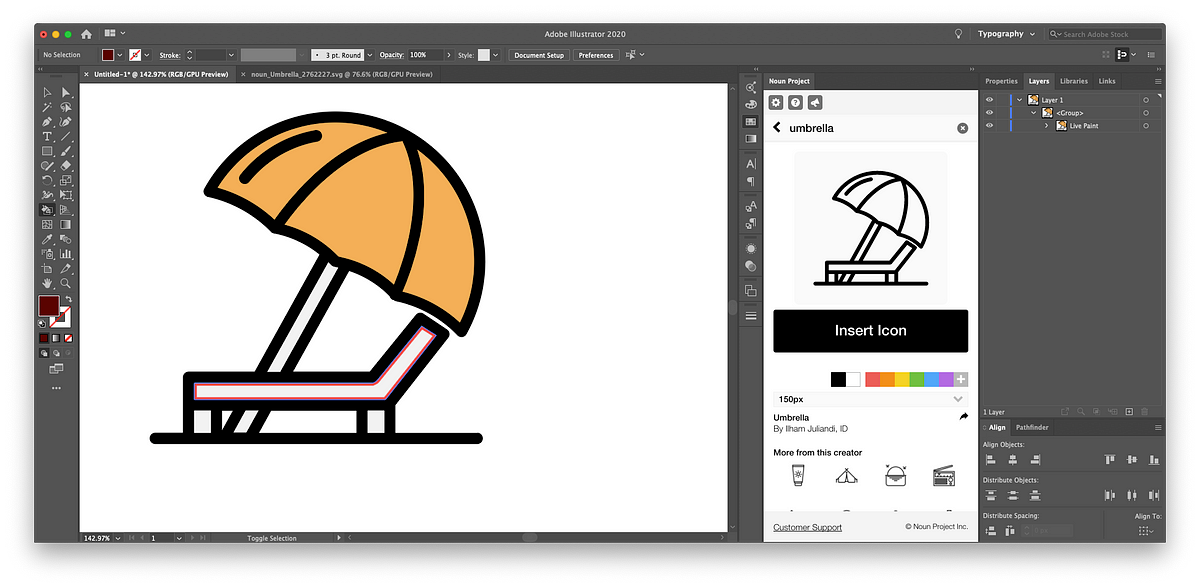
With Live Paint mode turned on (K), hovering over a region will let you know it’s ready to color in by displaying a highlighted border.
Color More Harmoniously with Color Themes
One of the most aesthetically pleasing ways to color in your icon is to search for a preexisting Color Theme. Adobe users can contribute their own themes based on common principles of color harmony, so you can easily produce an artwork with colors that go well together.
Open up Color Themes on the right-hand toolbar, or find it through Window > Color Themes. The middle tab of the window, “Explore,” will display some of the most popular color themes that fellow graphic designers are using. You can also search for your own theme (say, “Springtime” or “Flowers”) to find a palette that evokes those keywords. When you find one that you like, click the three dots (…) next to it and click “Add To Swatches.” This way, when you navigate back to your Swatches (Window > Swatches) you’ll have the colors saved so you can keep referring to the same ones for consistency.
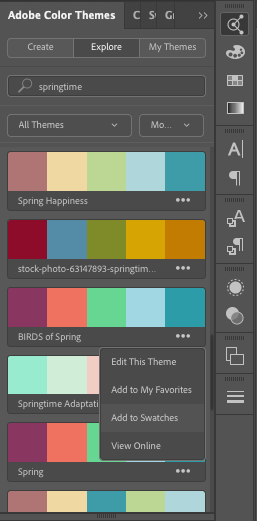
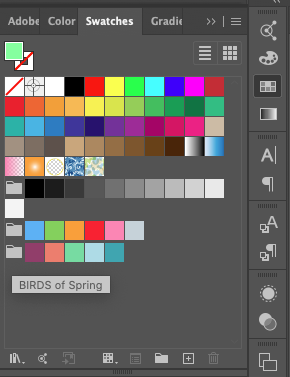
In the Color Themes window (to the left shown here), click the three dots (…) by a theme you like and click to “Add to Swatches.” Then open your Swatch window (to the right shown here) and you’ll find this theme at the bottom, so you can select the same colors whenever you’d like.
As you color, you may notice that your cursor has both a Live Paint icon and three small colored boxes above it — these boxes indicate the current swatch you’re using (in the center), and you can use your left and right arrow keys to quickly switch between colors as they appear in your swatches.
Note that you can use Live Paint not only with solid colors, but patterns and gradients as well. The easiest way to continue exploring the options is to add any gradient or pattern of your choosing to your swatches so you can easily find it later.
Use “Recolor Artwork” to Try Different Color Variations
Let’s say you’ve found a color theme you like, but you want to try a couple of different variations by swapping out what colors go where within your icon. You can tell Illustrator to instantly find all instances of one color, and swap them out with another color. Here’s how:
First, make a copy of your icon in case you want to compare the two side-by-side. With the icon selected (with V), hold down alt while clicking and dragging the icon to create a copy.
Go to Edit > Edit Colors > Recolor Artwork. This will bring up a window that displays your swatch colors in rows of “Current Color” with an arrow to pointing to “New Color.” This means it will take all instances of a color in the first “Current” column, and turn them into the “New” color you can designate in the second.
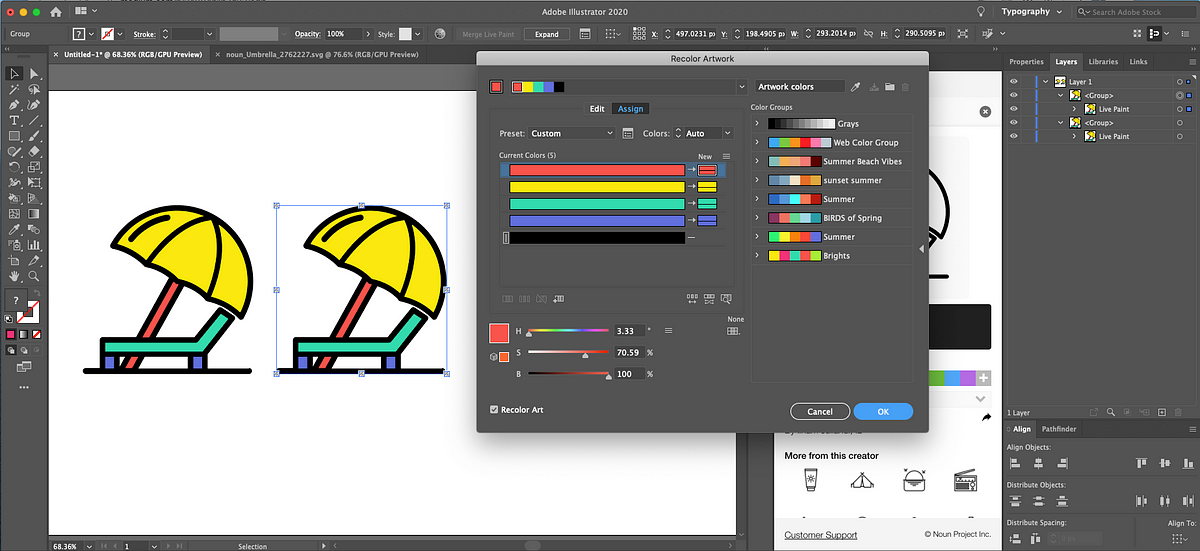
In the “Recolor Artwork” window, we can see two columns that control input and output for changing all instances of a given color. One way to quickly swap colors out is to simply click a colored box in the “New” column and drag it into a different row — those will swap out the colors as they appear on your artwork, as demonstrated below:
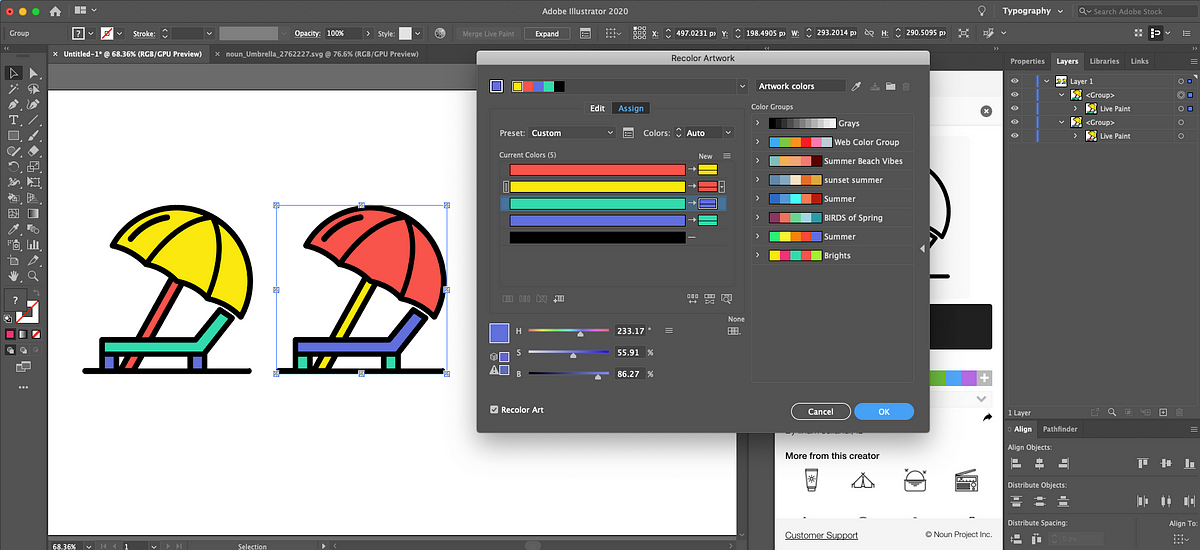
Drag and drop colored boxes in the “New” column into different rows to instantly swap colors: this instantly switched red with yellow, and turquoise with blue.
You can play around with this functionality to your heart’s content, using your preexisting swatches or manually picking new colors to replace your current ones. You can even hit the “Randomly Change Color Order” at the bottom of the color list in this window to explore surprising new variations.
Digital coloring using a tool like Adobe Illustrator is a great way to quickly produce spectacular digital artwork and instantly experiment with color combinations.


