Canva has long been an easy, accessible (and free!) go-to tool for anyone who wants to make an eye-catching design fast, even with no prior design experience.
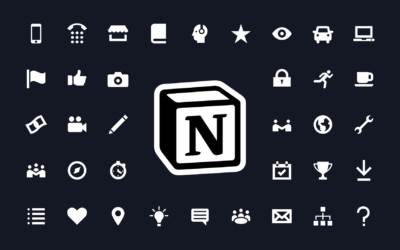
You can access a curated selection of Noun Project icons directly in Canva to add to your designs, and even print your own products like mugs, water bottles, or greeting cards.
With Valentine’s Day just around the corner, it’s the perfect time to whip up custom Valentines that are as unique as your love. Personalize a romantic greeting, a friendship note, or create a party invitation by starting a new design from scratch or using one of thousands of Canva templates.
Here’s how to get started:
1. Create a Canva Account or Log In
Canva is free for anyone to use when you sign in using your email. You can get a free 30-day trial of Canva to unlock even more features, including premium templates and a wider array of graphics and elements – including a curated selection of Noun Project icons available right inside the design builder.
2. Browse Templates
The easiest way to get up and running with your design is to customize a pre-existing template on Canva. From the Canva home page, you’ll see thousands of templates for any type of format you need, from social media graphics to presentations, cards, and more.
With Canva’s new print product offerings, you can even find templates for folded cards, flyers, mugs and apparel. Plus, any template you like can be adapted to a new format– including printable formats– with the “Magic Switch” feature.
Start with a search using keywords like “Valentine” or “Valentine folded card,” and then you can further refine your search using descriptors like “minimalist,” “funny,” or “elegant.”
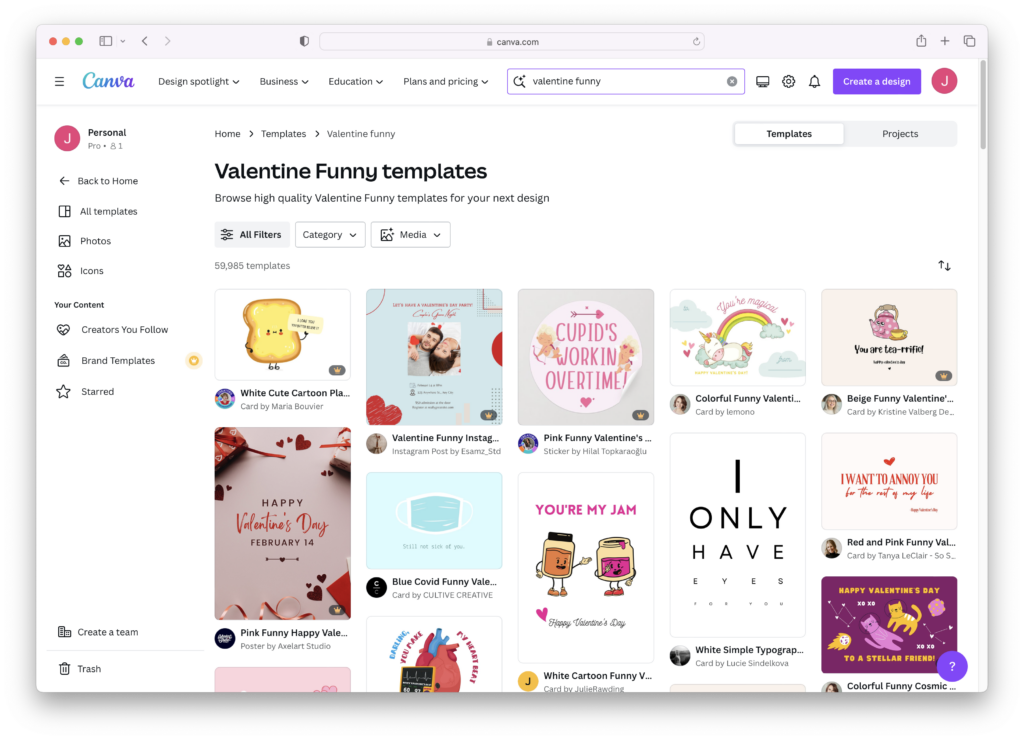
3. Edit Your Template
After finding a design you like, click “Customize this Template” to get started.
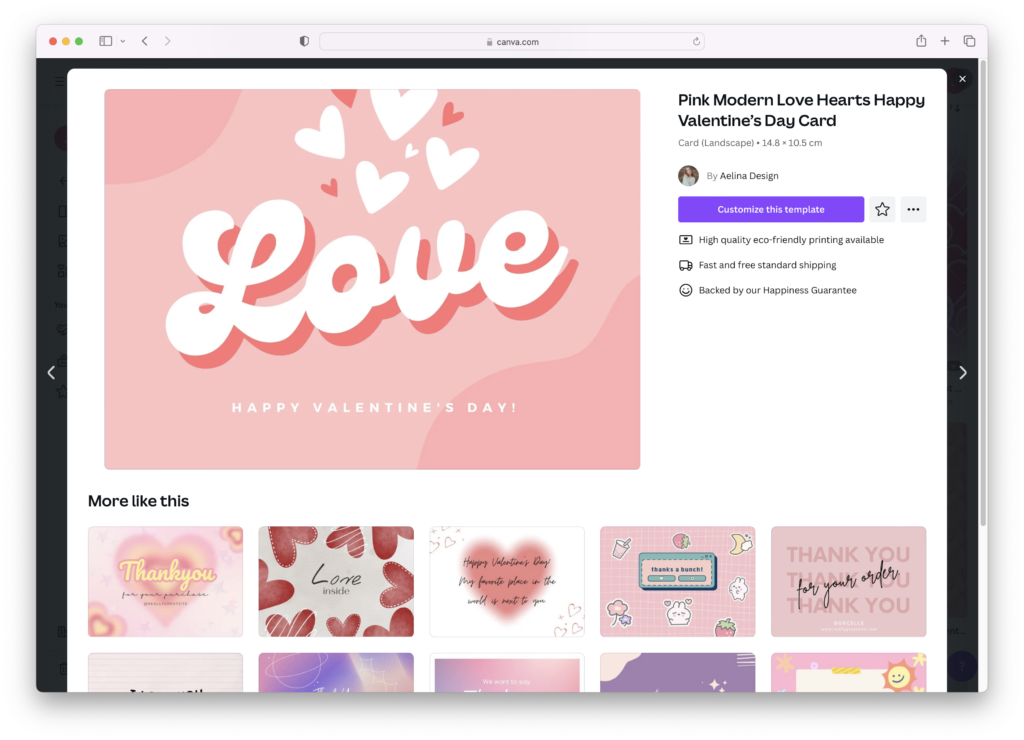
In the editing pane, you can select any element you see to edit it. By double-clicking the text boxes, for example, you can insert new text and rearrange the placement of the boxes to your liking.
Any layer you click can also be locked to prevent further changes, or re-ordered using a right-click and a command like “bring forward” or “send to back.” Each element you select can be resized proportionally using its bounding box.
4. Search Images and More in the “Elements” Panel
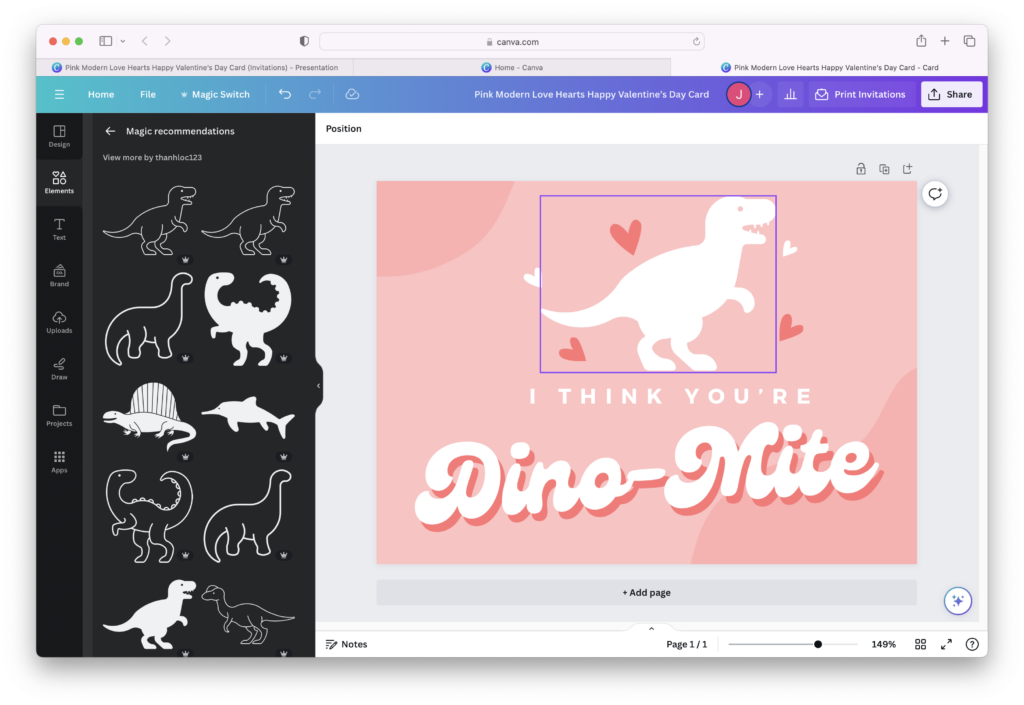
Canva’s “Elements” menu on the left-hand side of the page allows you to search visuals like icons, stickers, GIFs, stock photos, and other decorative elements.
Plug in any search term using a phrase like “dinosaur” or “dinosaur icon” and you can click any graphic to instantly insert it. You can also search “@nounproject” or view our Canva profile page to search exclusively for icons from Noun Project creators!
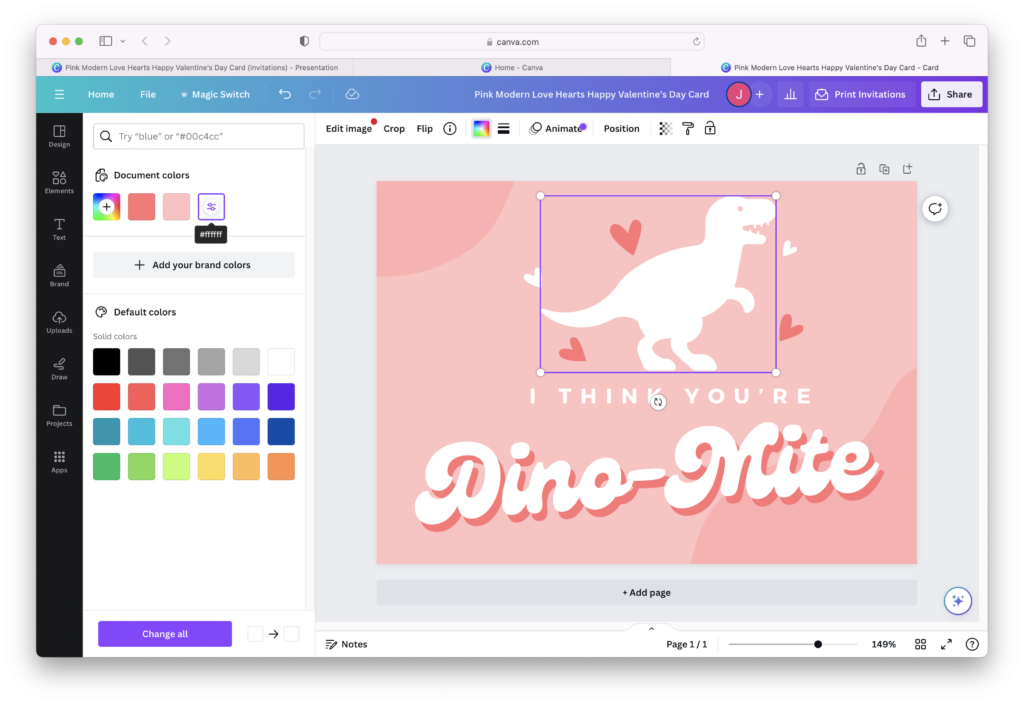
While many stickers or GIFs are pre-colored, icons have the advantage of being editable vectors, so you can select an icon and instantly recolor it within the colors panel. Canva will even display your document colors at the top of the panel, giving you the colors within the predetermined scheme of your design for reference.
You can duplicate, scale, and arrange any icon you see across your canvas.
Want even more icons? Download your favorite Valentine’s icons directly from Noun Project as an SVG – or use the Noun Project Mac App to instantly drag-and-drop icons from the small desktop window into your Canva workspace. Using SVG rather than PNG icons will keep them editable in the Canva pane so you can recolor them. (Pro tip: a NounPro subscription will give you unlimited icon downloads and customizations across the website and all apps and plugins).
“Magic Switch” to Explore More Templates and Products
Found a design built for digital that you’d like to print? You can translate your design to a different output or product by clicking “Magic Switch” on the top menu bar. Select the new format you want – in this case a Landscape Folded Card – and click “Continue.”
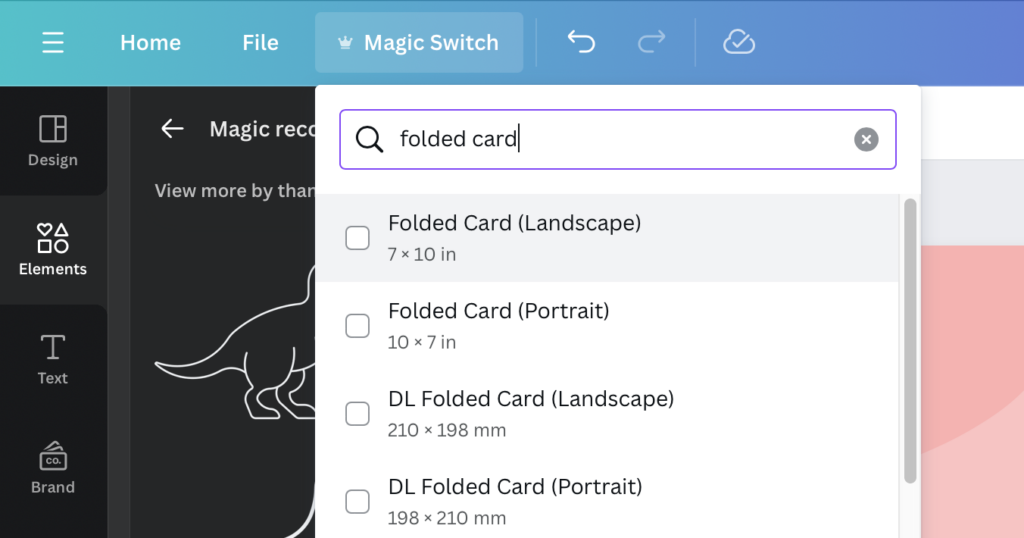
Note that once you switch to a new format, you may have to resize or rearrange your elements again to better fit the new size.
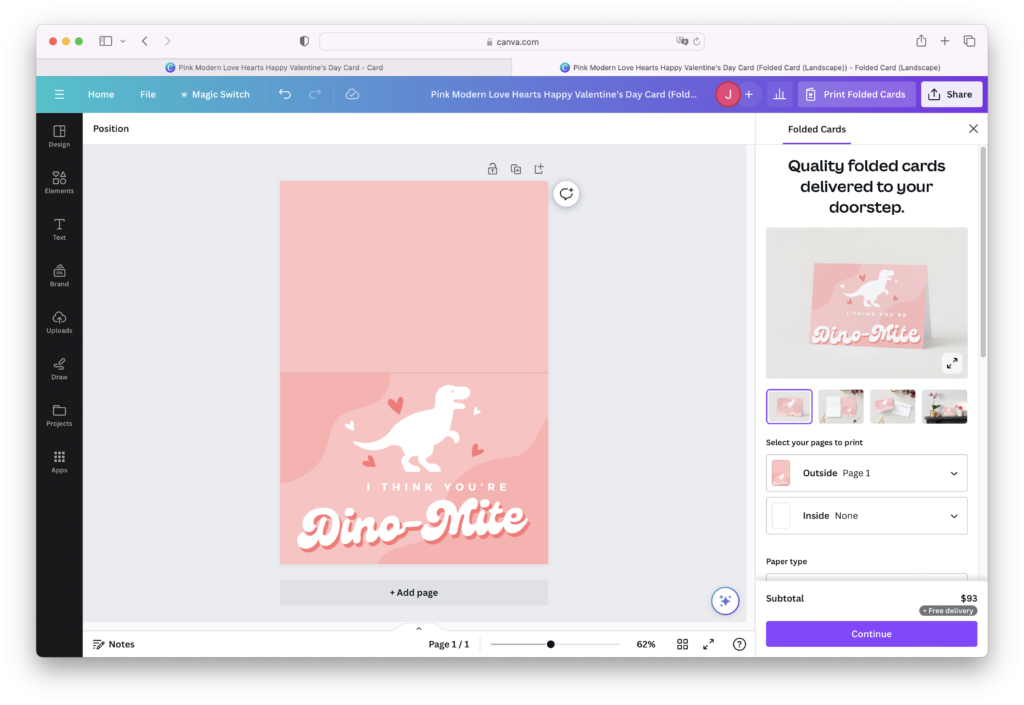
Want to complete the folded card?
Select “Add Page” to make a second layout so you can print the inside as well as the outside.
You can select the background color (pink in this case) and delete it to give you a blank white inside.
Adding a new text box inside from the left-hand menu, you can create a custom message.
The right-hand menu will show you the print product you can order.
Be sure that it prints both the outside (page 1) and the inside (page 2) of the card!
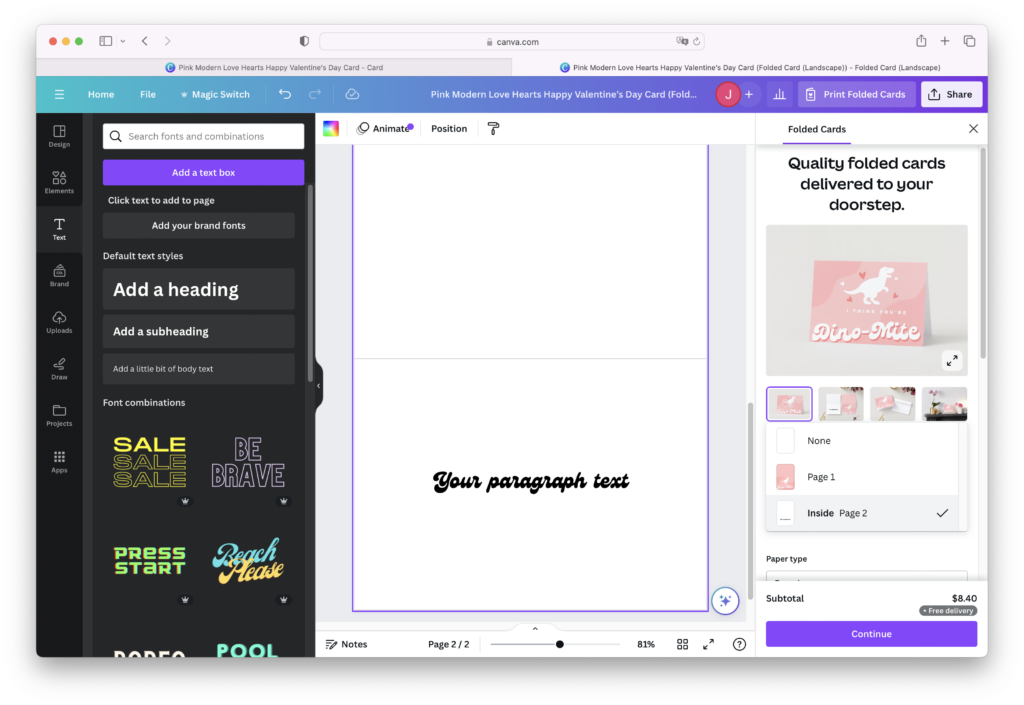
Ready to print and deliver? Click “continue” in the product panel and complete the purchase.
Share Your Iconic Valentine with Us!
Show us your creation by tagging us @nounproject on our Twitter or Instagram.
Looking for more easy DIY projects? Browse through more DIY tutorials on our blog.

