Looking for quick, simple ideas for DIY Halloween decorations?
Previously we’ve shown you an easy way to use Noun Project icons as pumpkin carving stencils, so you can unleash the possibilities of your jack-o’-lanterns beyond the standard store-bought templates.
If you’re looking for an even quicker (and much less messy) way to add a spooky touch to your home décor this season, we’ve put together this handy tutorial about how to create your own print-at-home paper Halloween luminaries using Noun Project icons. By using Google Slides with the Noun Project Add-On, you can quickly insert and print icons at home.
Let’s get started!
What You’ll Need:
- A printer and plain printer paper
- Scotch tape or a glue stick
- Scissors or an X-ACTO knife if you want to stencil
- Electric tea lights (flame candles are not recommended for this paper craft!)
- A paper bag (such as a white lunch bag) or glass jar
First: Set Up Your DIY Halloween Luminary Design
It’s easy to print out a luminary design at home on basic 8.5″x11” sheets of paper. You can create a new Google Slides presentation to quickly add icons and adjust their placement for printing at home.
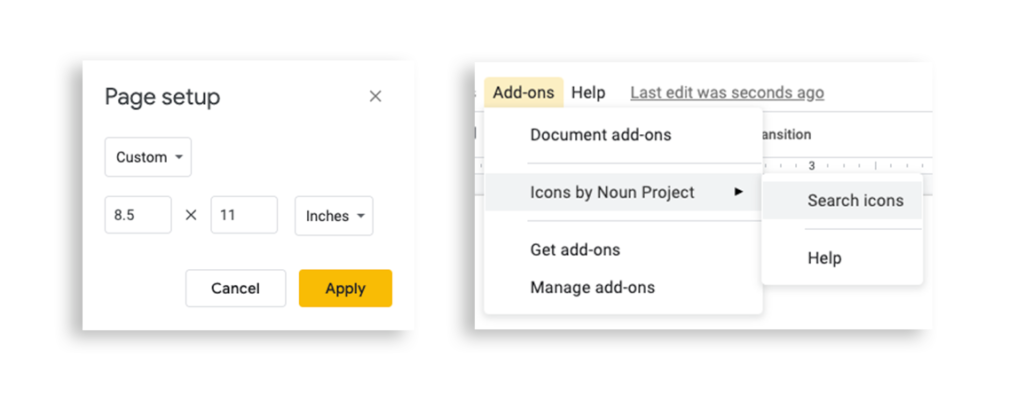
- Go to slides.google.com and create a new, blank presentation.
- Go to File > Page Setup and set the common A4 dimensions, 8.5” by 11”
- You’ll want to adjust the design for your final product – you can use a printed luminary sheet on a white paper bag, wrapped around a jar, or even simply rolled into a tube by itself. Grab a ruler to measure the dimensions of your item – most standard white paper lunch bags are 11” high and about 5” wide, so printing your design on a portrait (vertical) 8.5 x 11″ sheet should do the trick. You can also place two icons side-by-side in landscape mode.
Browse Noun Project for Design Inspiration
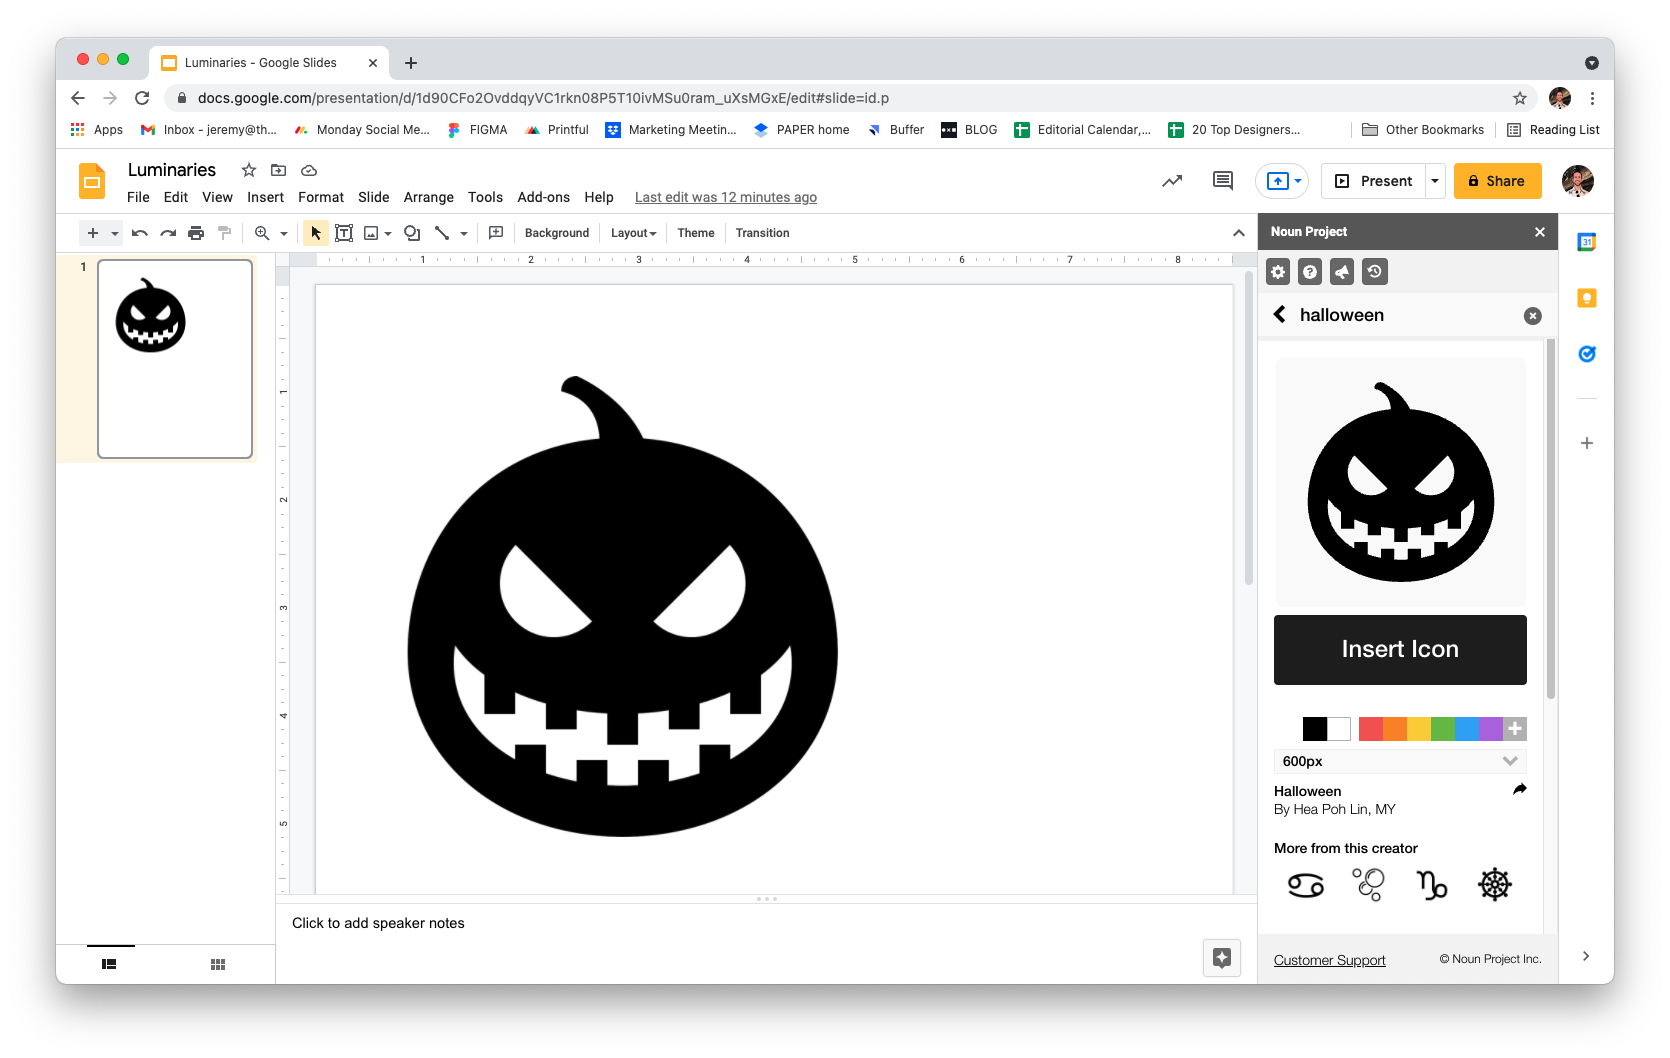
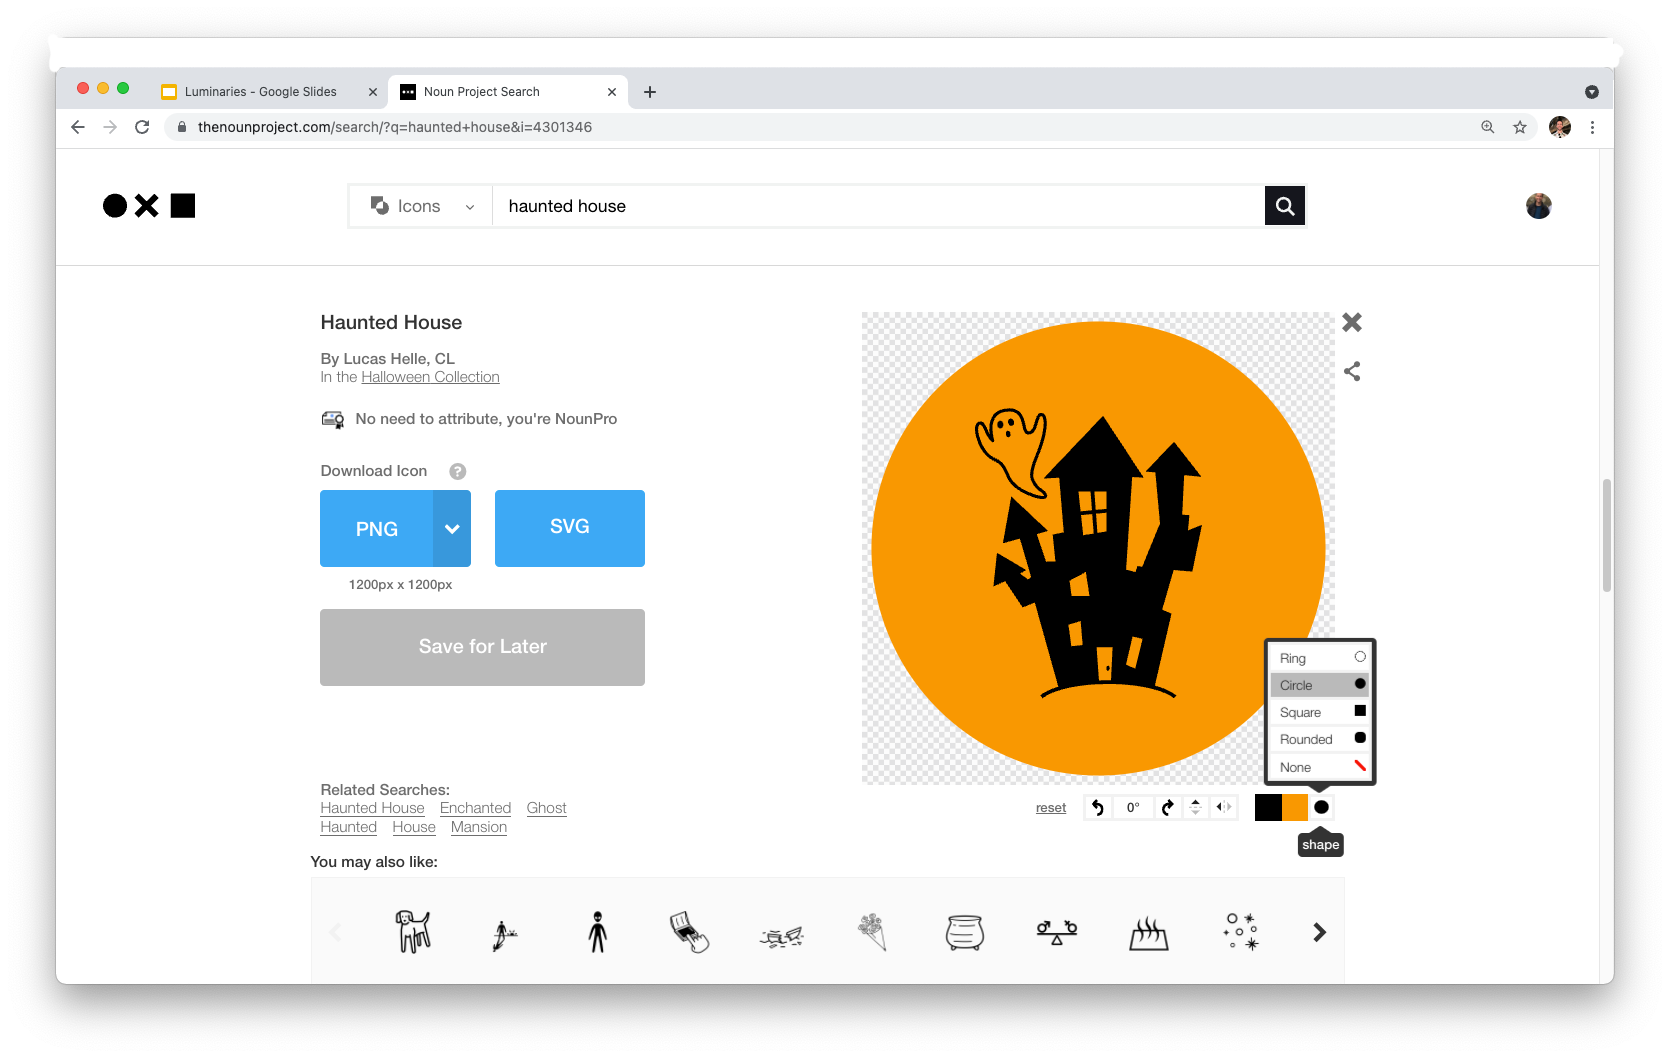
Noun Project has tens of thousands of Halloween icons that you can download directly from the website. Even better? You can search for icons without leaving your Google Slides window by downloading the Noun Project Add-On for Google.
The Add-On comes with a free set of 100 starter icons, but upgrading to a Icon Pro account will allow you to enjoy unlimited, royalty-free icon downloads and customizations when you log in to your account through the add-on window.
From your Google Slides window, go to Add-Ons > Noun Project > Search Icons to log in and begin your search. Plug in a search term like “Halloween,” “Bats,” or “Spooky” and click any icon to download and insert it directly onto your page.
Keep in mind that – as with any icon – the simpler and more legible it is, the more effective it will be in this format.
Want more inspiration? Check out our roundup of some of our favorite Halloween icons.
Tip: Want even more instant customization options? Download icons straight from the Noun Project site, and you can add background shapes with solid colors, recolor or rotate your icons. Just look for the small color, background and shape customization icons beneath each icon’s detail view and download your adjusted .PNG.
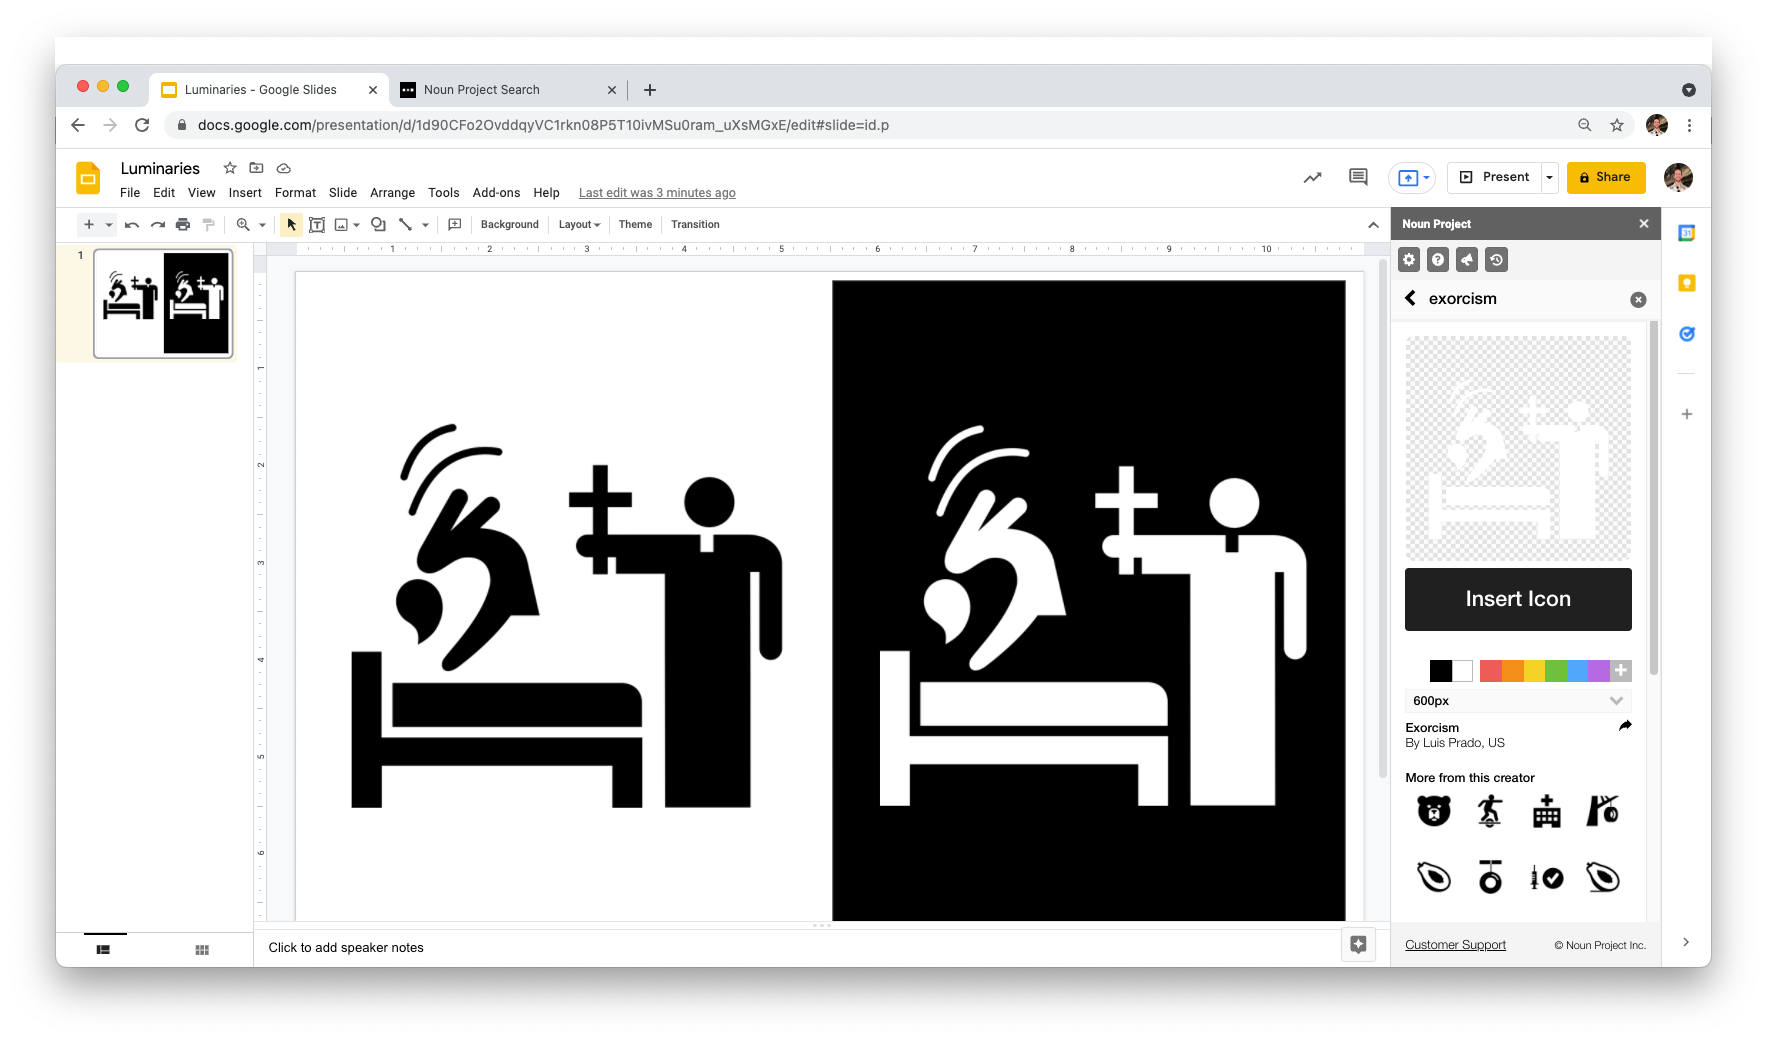
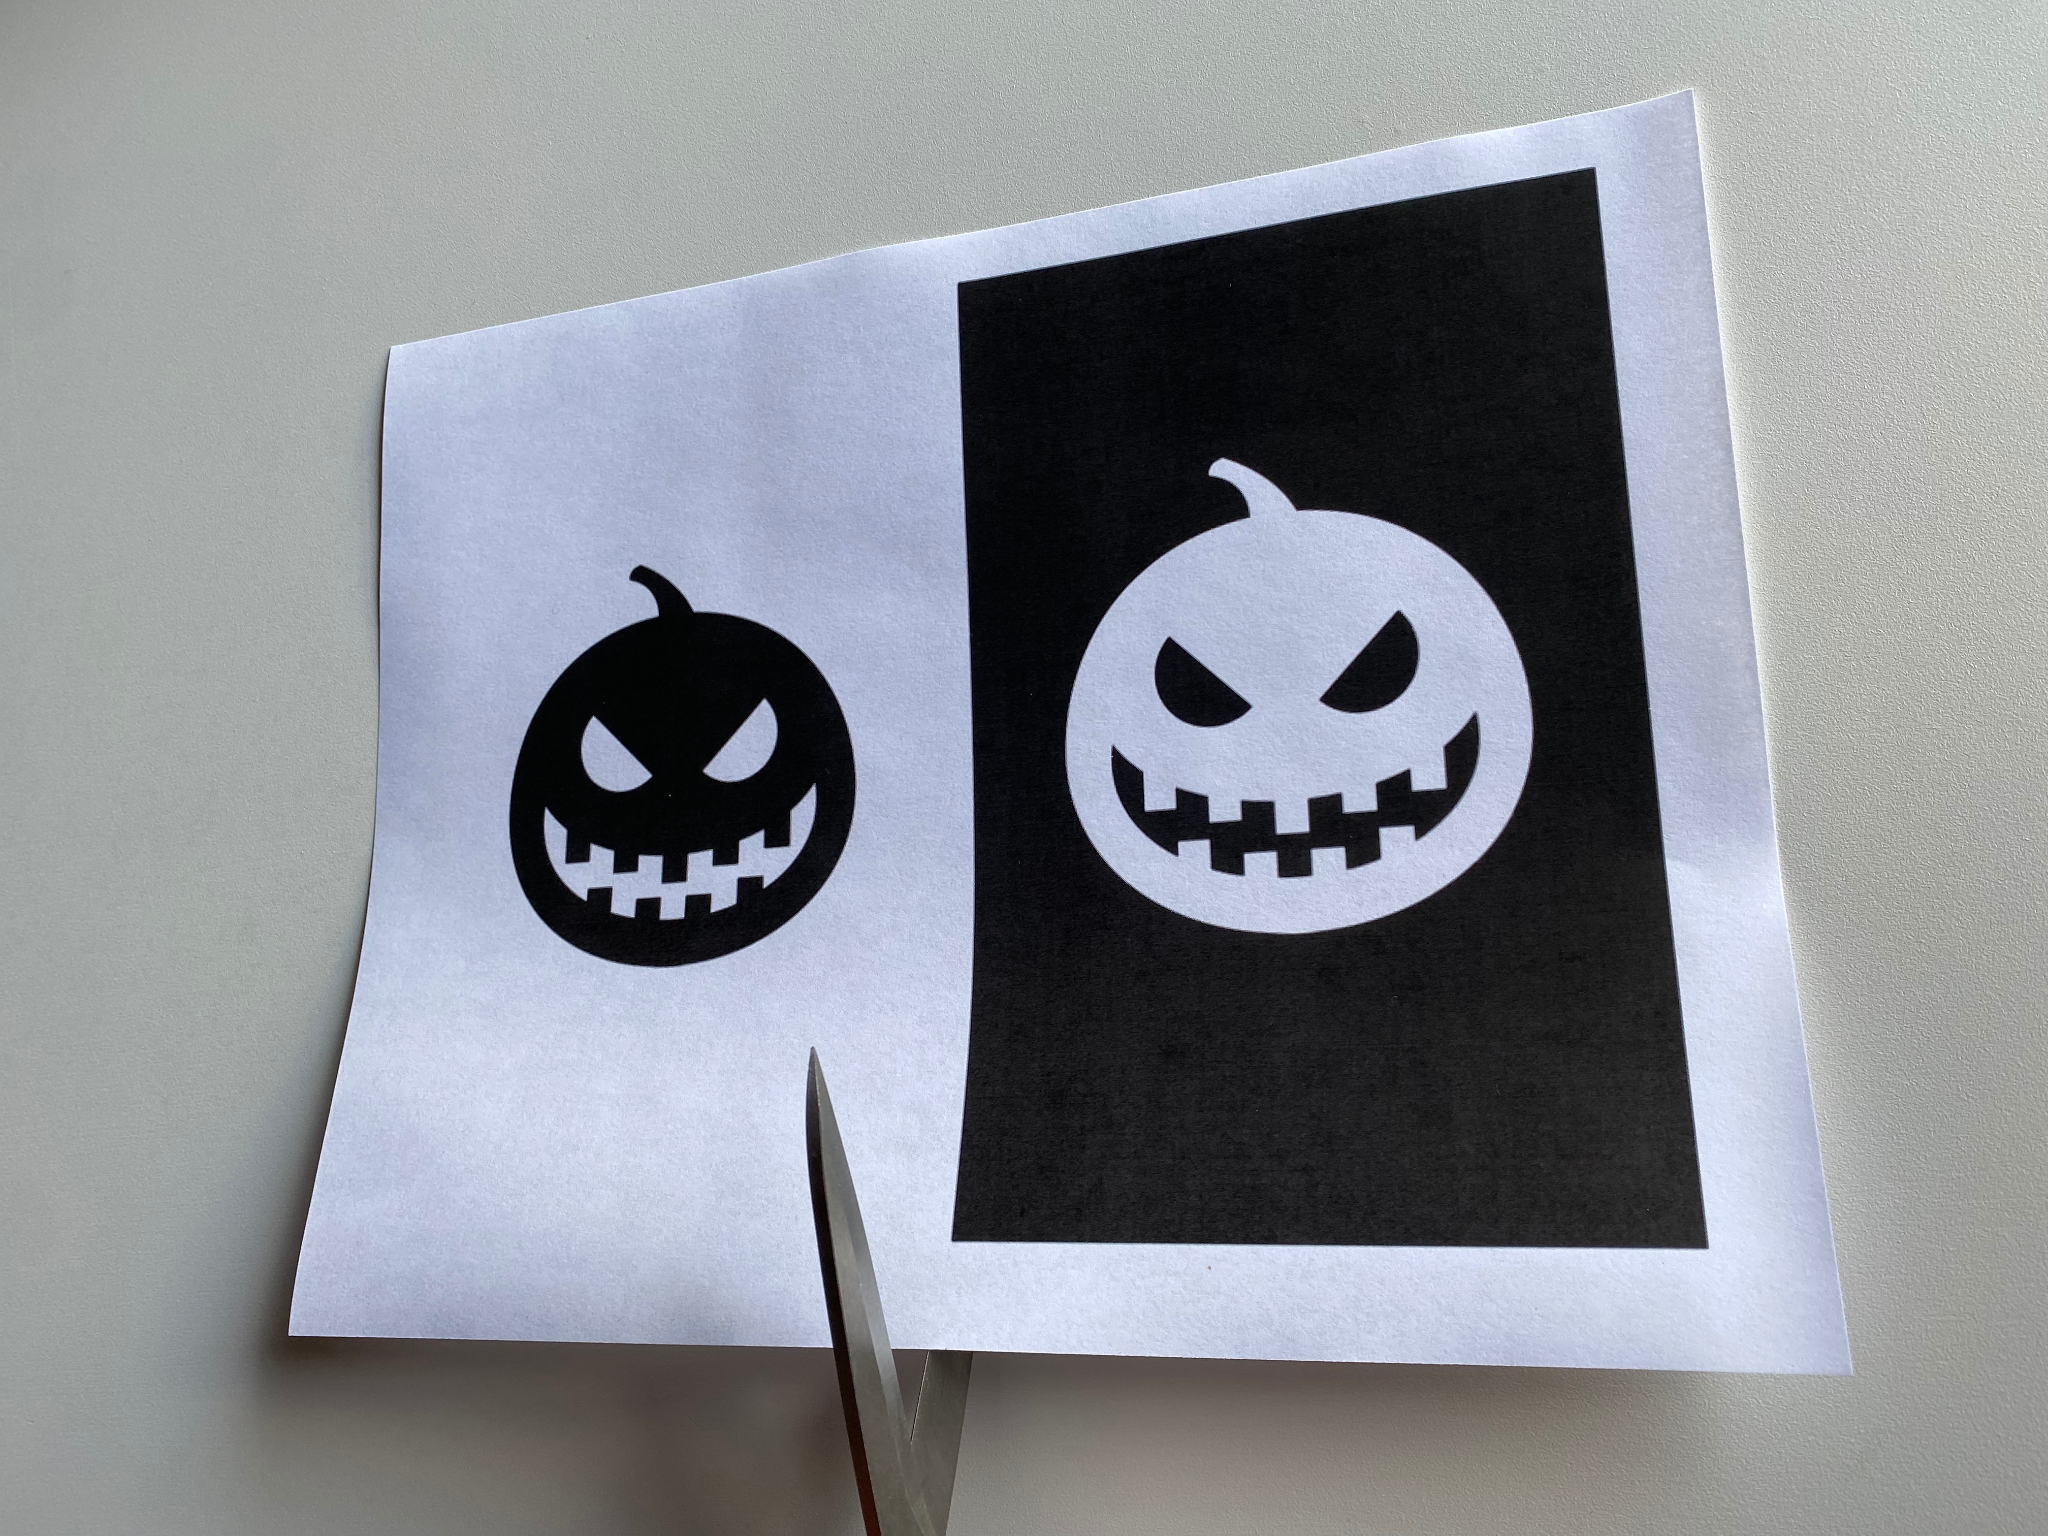
Black-on-White or White-on-Black?
You can play with different types of illumination, with a white “cut-out” icon appearing against a black background, or a plain black-on-white design.
To add a background color, go to the Shapes icon in Google Slides or click Insert > Shape > Rectangle. Set a shape color (in this case, black) and make sure the rectangle is sent to the back (right click the rectangle, then go to Order > Send to Back). Then when you insert a new icon, be sure to click the white color icon, or another color that has sufficient contrast to be visible.
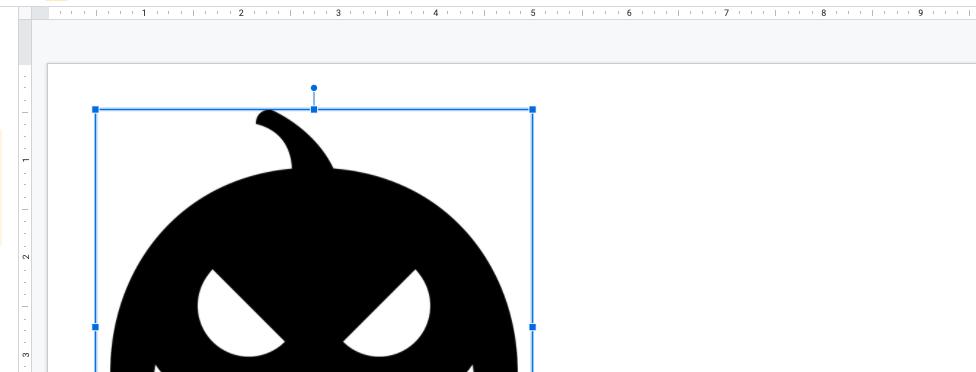
Adjust and Position Your Icons, Then Print!
Based on how you want to construct your DIY Halloween luminary, make sure the icons are sized accordingly. Use the rulers along the top of the Google Slides window to double-check the sizing. For traditional white paper bag luminaries, which are 5” wide, I’m printing smaller designs, two across on a landscape page. Just be sure you leave a standard print margin of at least .5″ on all sides.
A note about printing from Google Slides: For best results, go to File > Download > JPEG Image. Some PDF’s or even PNG’s printed directly from Google Slides will print as black squares, so it’s best to use JPEG’s and print with your system’s dialog.
Once your icon sheets are printed, it’s up to you how you want to illuminate them. The traditional DIY Halloween luminary is a simple white bag (like a paper lunch bag) with a stencil cut out. If you’ve got an X-Acto knife handy and feel ambitious enough to cut out your icon into a stencil, try it out! But a simple black-on-white printout can still make a fantastic visual statement on its own with proper illumination.
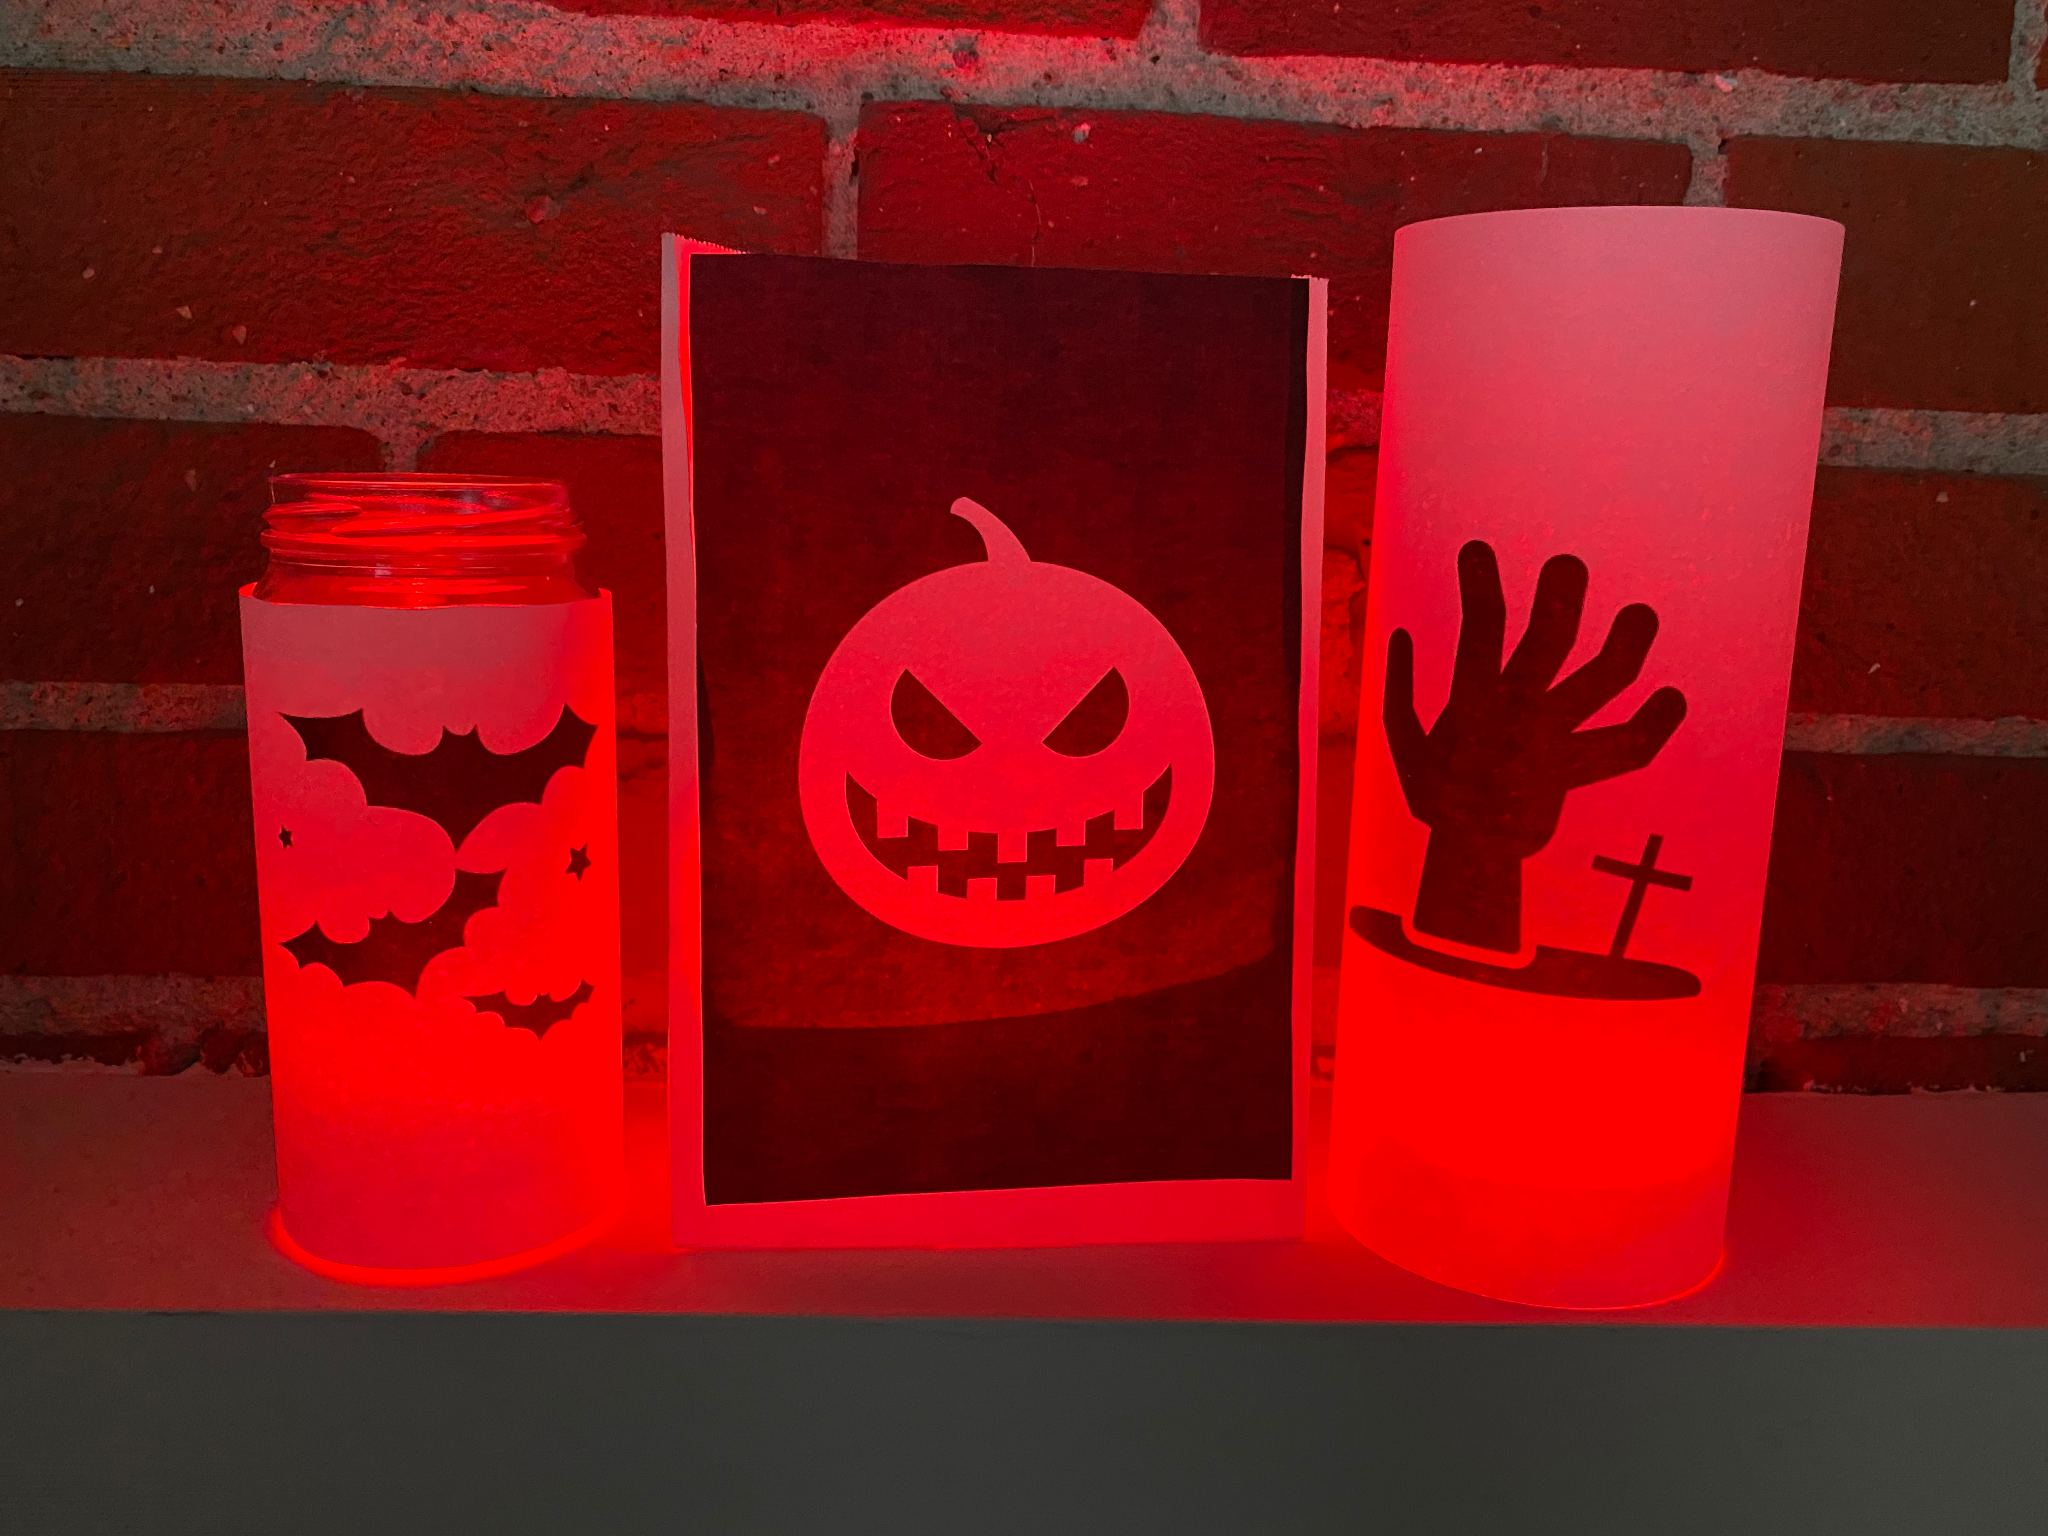
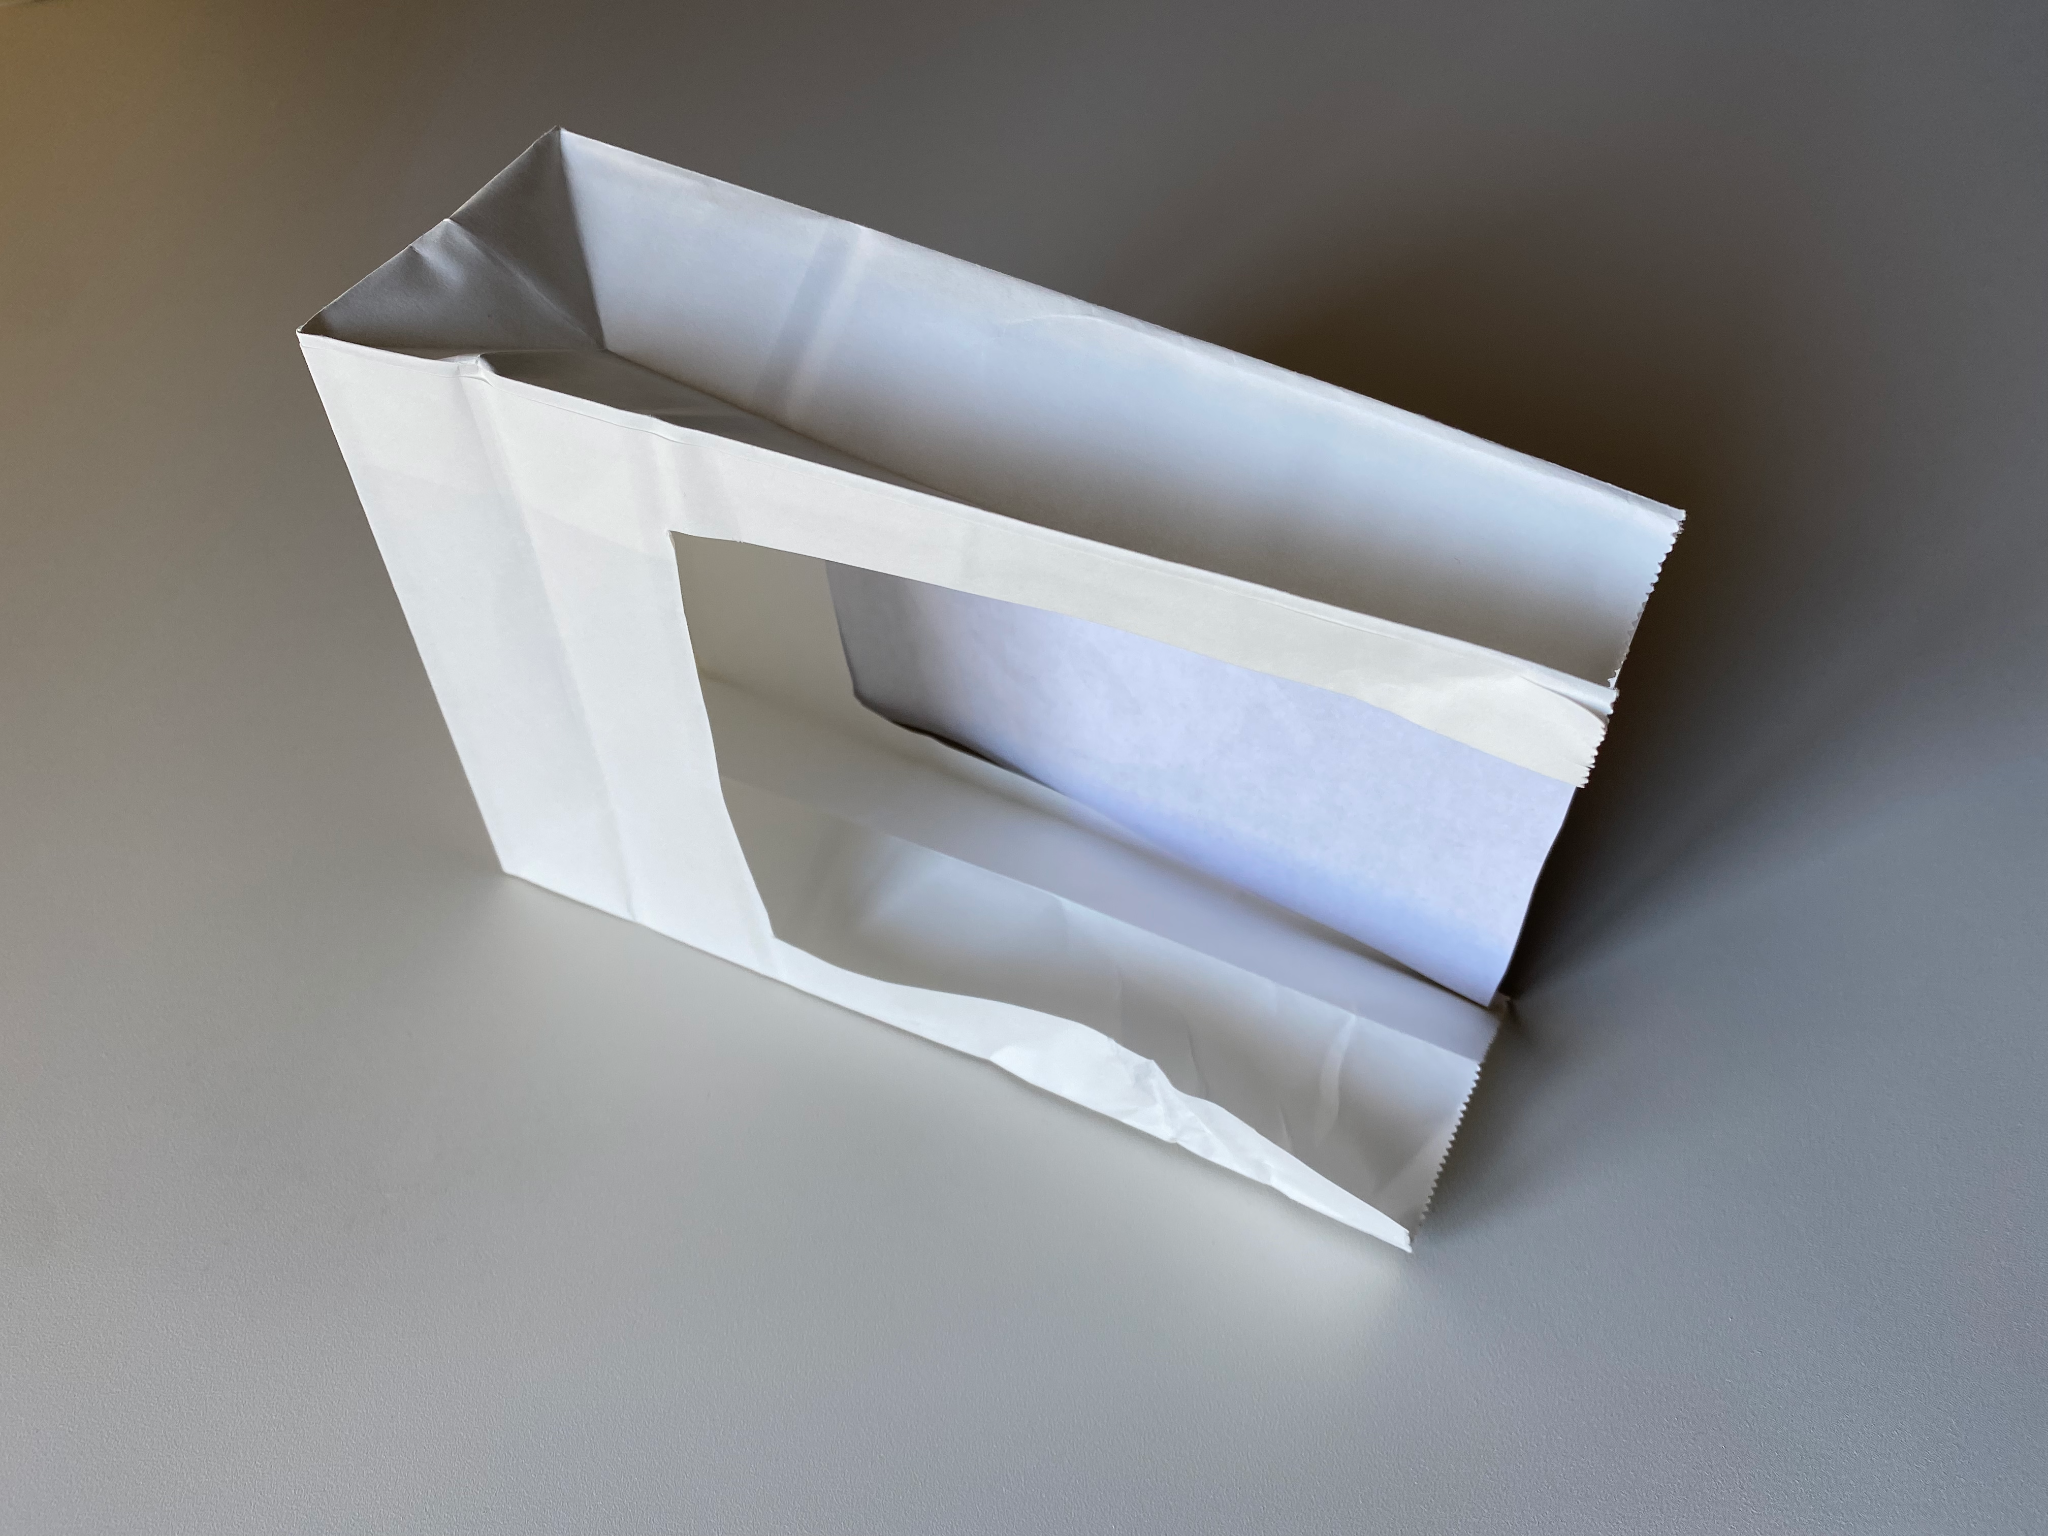
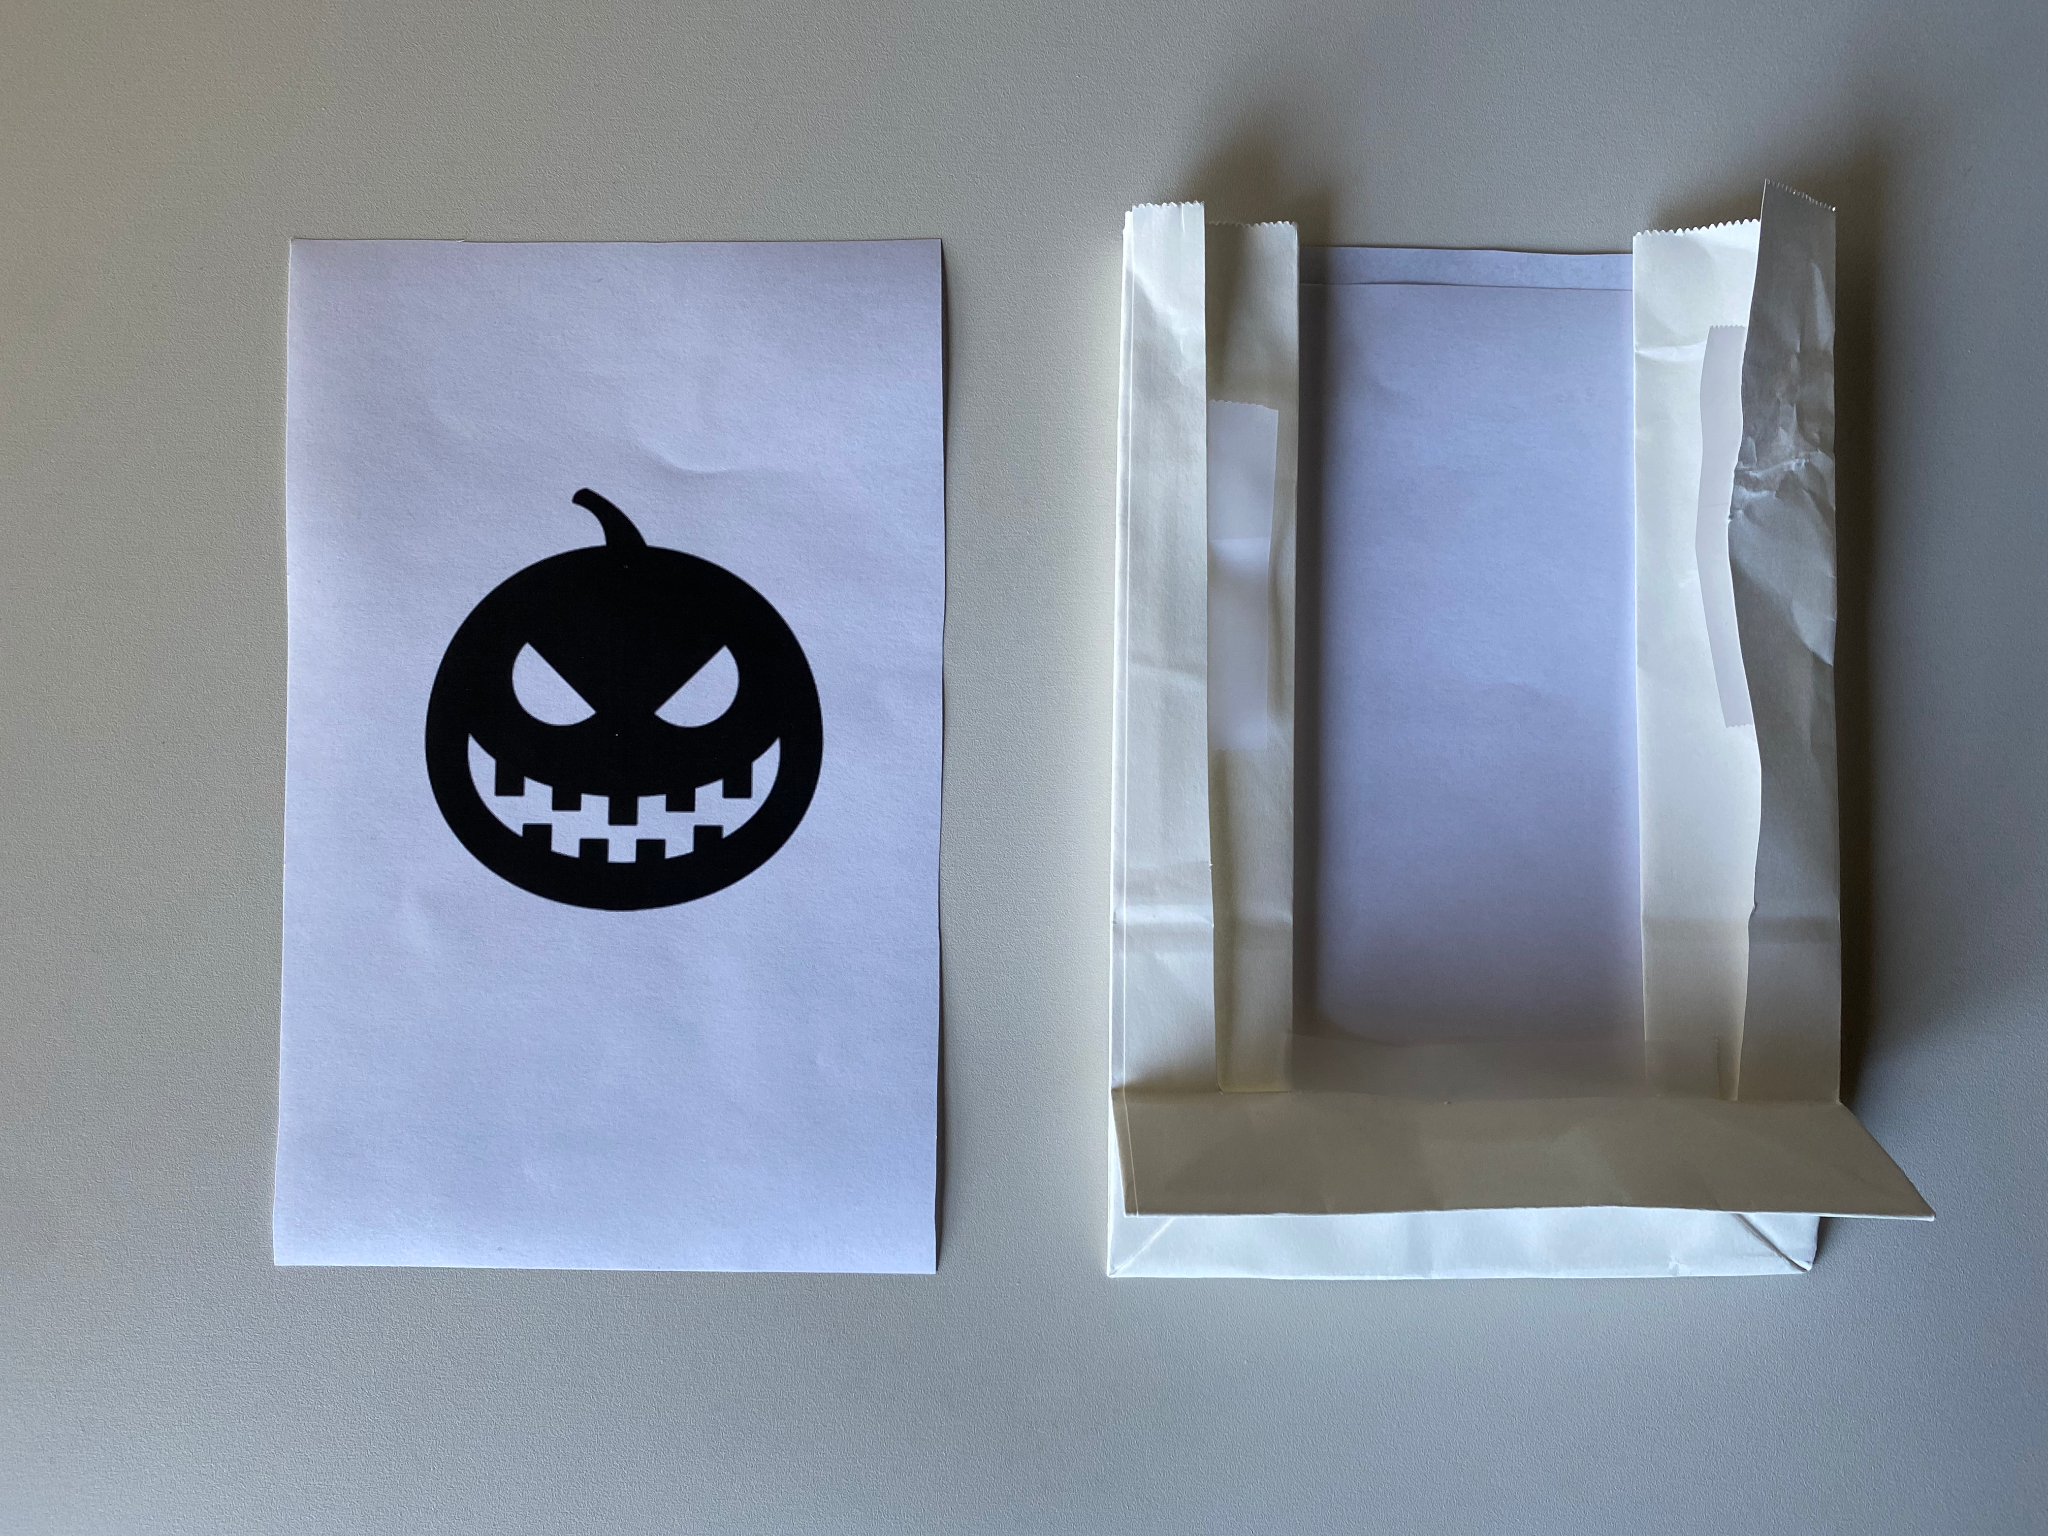
Paper Bag, Roll-Up, or Jar Method
Traditional Paper Bag Method:
- Cut out your shape so it’s the same vertical width as your paper bag. If you have a brighter source of light, you may be able to tape or glue the sheet directly on top of one broad side of the bag.
- Test out your illumination as you go by dropping in your light source. For the standard electric tea light, illumination may be a bit dim, so it’s best to replace one side of the bag with your sheet to reduce the thickness and let more light shine through.
- Using scissors, cut out a square from one side of your paper bag. Make sure that there is overlap between your sheet and the edges of the bag so that you can then tape or glue the bag on, making sure the design is aligned with the edges.
Roll-Up Approach:
It’s amazing what a little illumination can do: you can simply roll your printed sheet into a cylinder and add your light source beneath. Just be sure the two are anchored together in some way so the paper doesn’t blow away! This is also a great way to make custom DIY Halloween lanterns to string along a strand of mini lights.

Jar Approach:
Chances are, you’ve got some spare jars laying around the house and you may find this approach even easier than paper bags. Simply trim your printed sheet to the height and circumference of your desired jar, and tape or glue it to the surface (to reuse the jar, we recommend simply taping the design to itself on the back side of the jar).
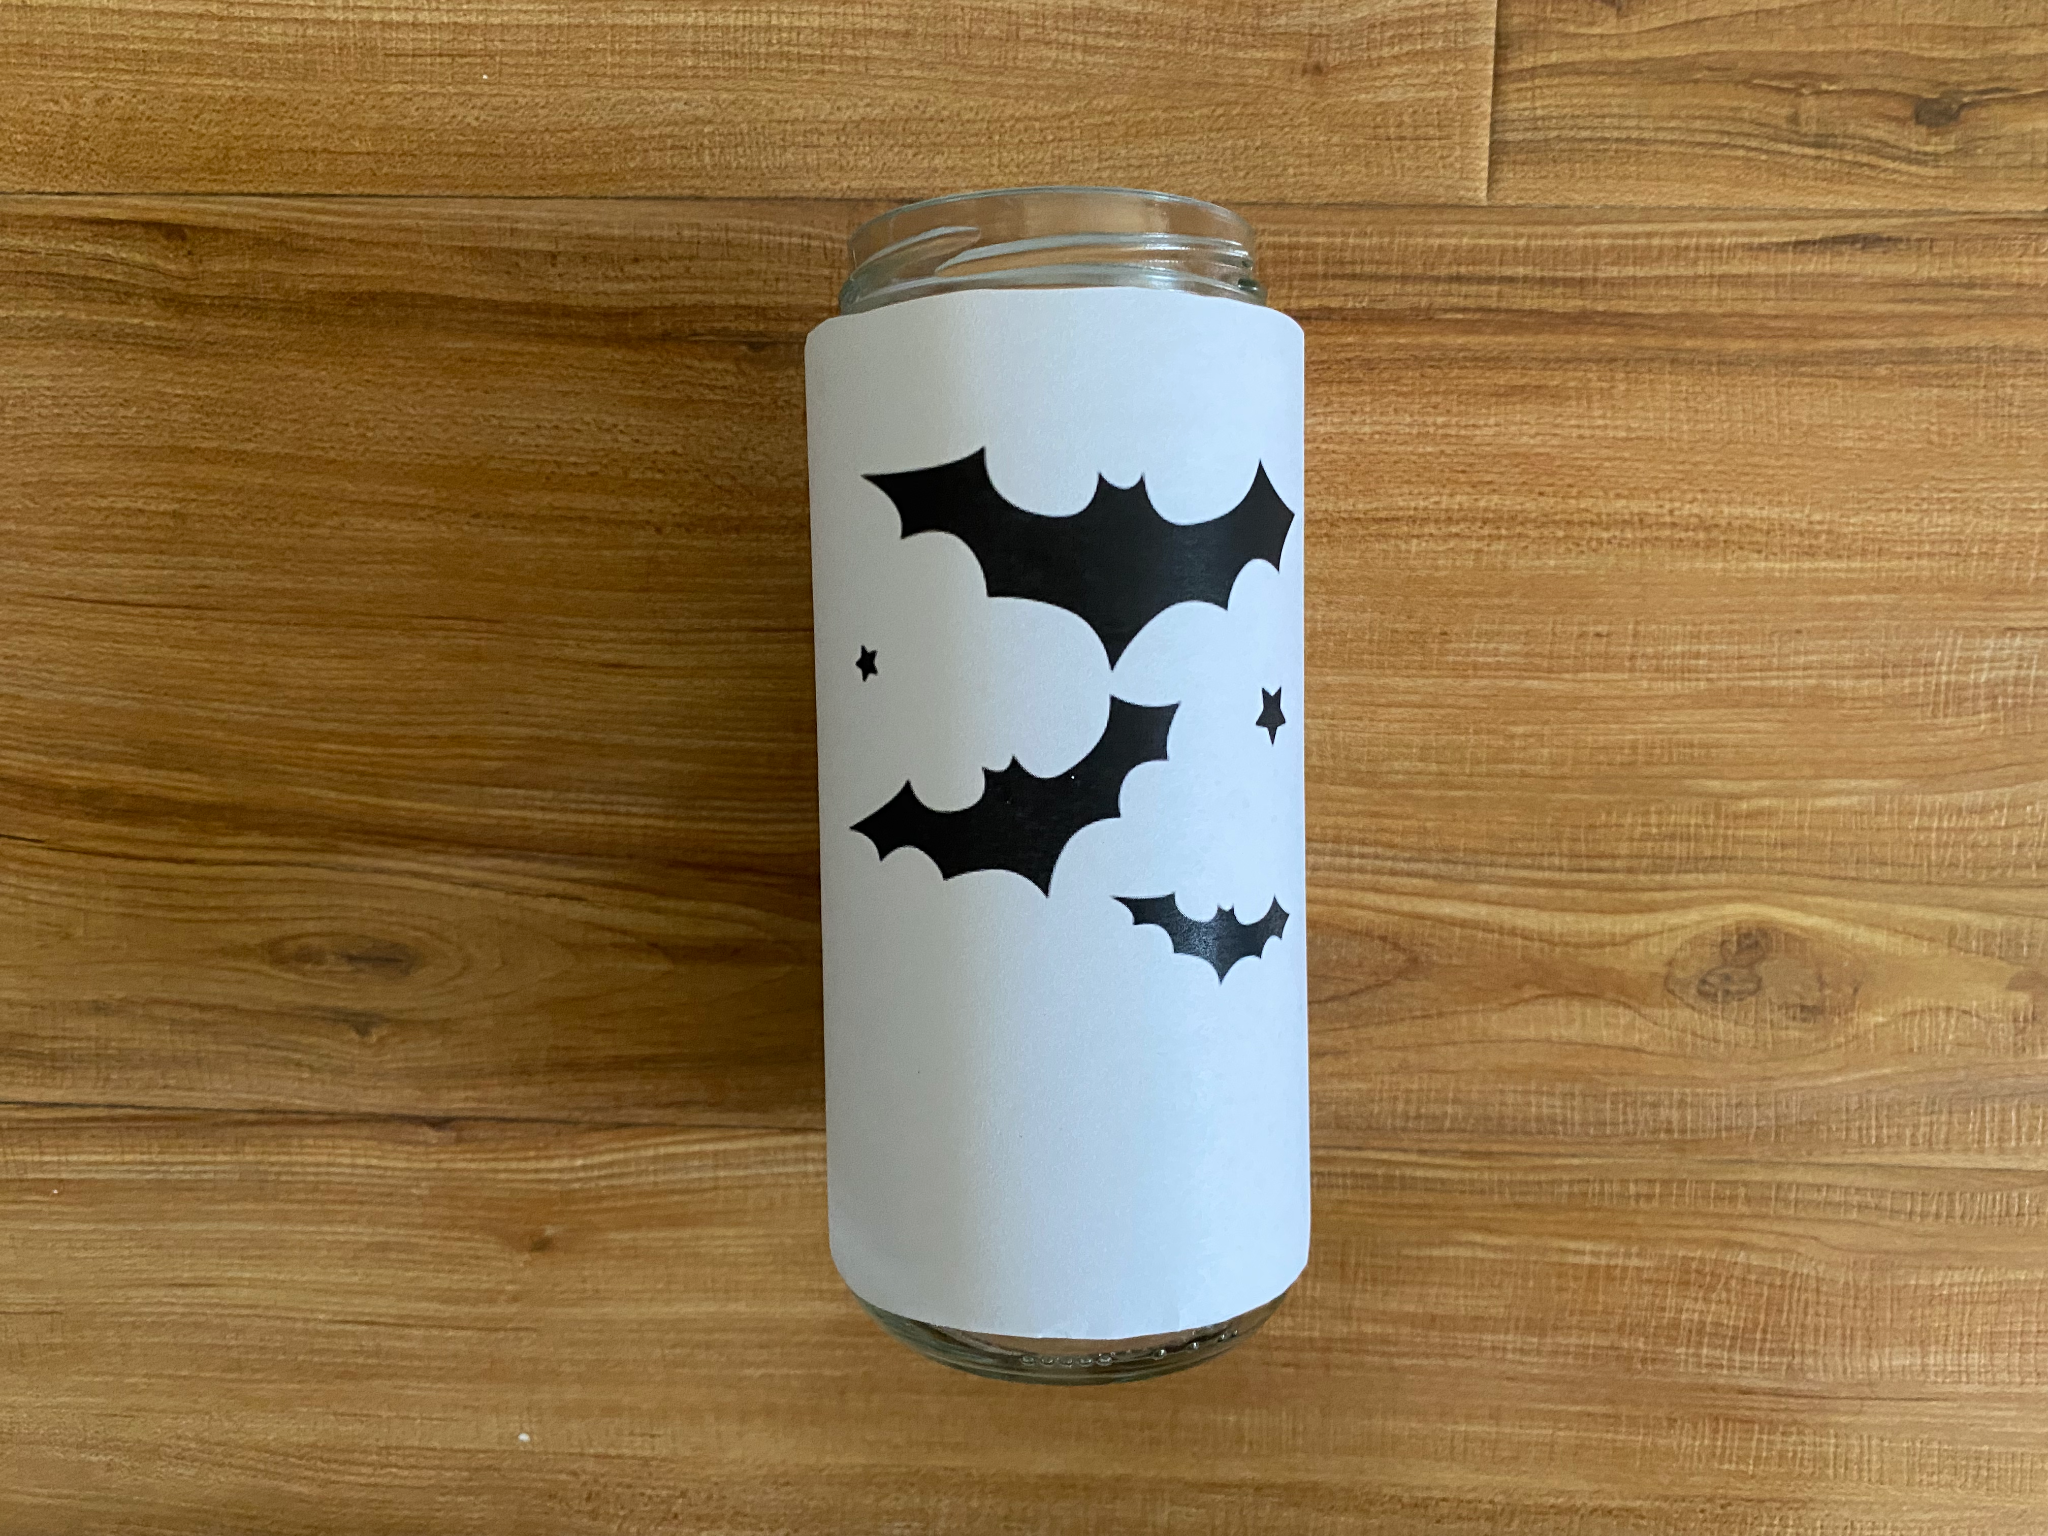
Add your tea-lights and voilà!
Show us your iconic DIY Halloween decorations by tagging us on Twitter or Instagram @nounproject
Looking for more crafty inspiration? Check out our other DIY tutorials.