
The only thing more visually pleasing than a well-designed icon is a neat, eye-catching pattern made with dozens of them. You can level up your Zoom backgrounds, social media cover photos and more by building your own repeating pattern with your favorite icons.
Drawing from Noun Project’s extensive library, you can use Adobe Illustrator or a free online pattern-making tool like Patterninja to build your own.
In this blog post, we’ll cover how to make a pattern in Illustrator. For those who are more comfortable in Photoshop, read our accompanying post How to Make a Pattern in Photoshop — but know that the capabilities of these two programs differ somewhat, and Illustrator will give you greater control over how you create a pattern and adjust its contents after you’re done.
Let’s dive in:
Create a Pattern in Illustrator CC with the Noun Project Add-On
The Noun Project Adobe Add-On is your new best friend for bringing Noun Project’s vast library of over 3 million icons right into your workflow. Just like our Mac App, this extension allows you to search within our boundless database and instantly drag and drop icons right onto your artboard.
This extension comes with 100 free starter icons, but an Icon Pro account will allow you to search and instantly download any icon you want, royalty-free, and enjoy the additional options to customize color, size, rotation and background shape instantly.
- Download the Adobe Add-On, open Illustrator and click “Create New” to make a new document. Illustrator comes with several templates for web or print — in this example, let’s just click their “Web-Large” template that’s 1920 px wide by 1080 px tall, a common aspect ratio for web pages, YouTube videos, and more. Make sure the document Color Mode is in RGB for web, and click “Create.”
Note: Other common dimensions you might want to try include a Twitter cover photo (1500 px wide by 500 px tall) or a Facebook cover photo (820 px wide by 360 px tall). If you’d like to print your pattern, just be sure to pick the common “Letter” size and make sure the Color Mode is on CMYK.) - Find the Noun Project Extension under Window > Extensions > Noun Project.
- If you’re an Icon Pro subscriber, sign in to your account to unlock your unlimited, royalty-free icon downloads and customization options.
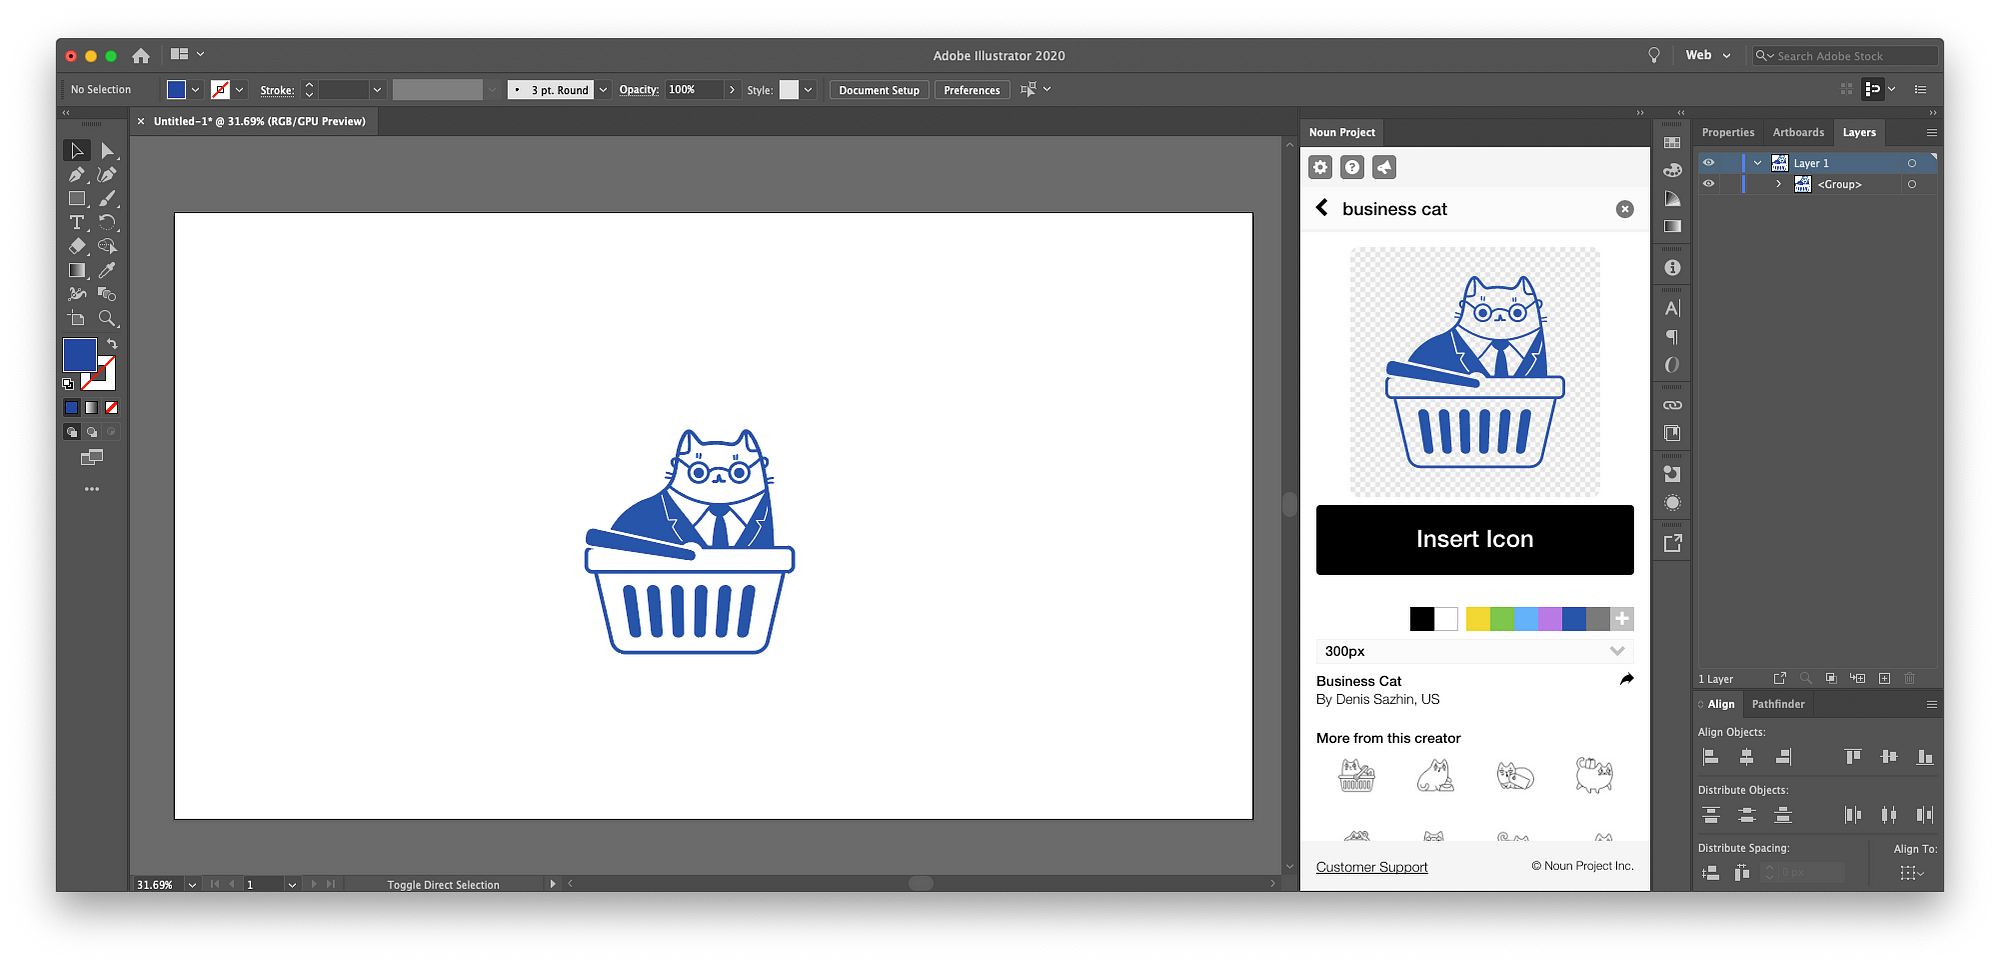
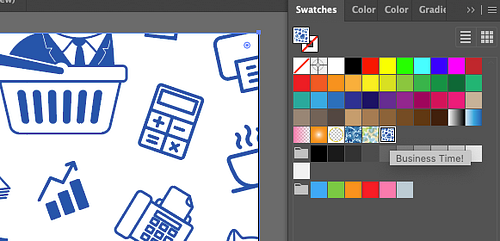
- Search for your an icon of your choice and click “Enter”. In this example, I’ve searched for “Business Cat” by Denis Sazhin. Hovering over an icon, click the black “download” arrow in the upper-right to instantly insert it onto the canvas, or you can click the icon to reveal customization options.
- If desired, you can select a color from the bar of options or click the gray “+” to hand-select your own or enter a HEX value. Once you’ve selected a color, all new icons you search will appear in that color by default until you revert to black.
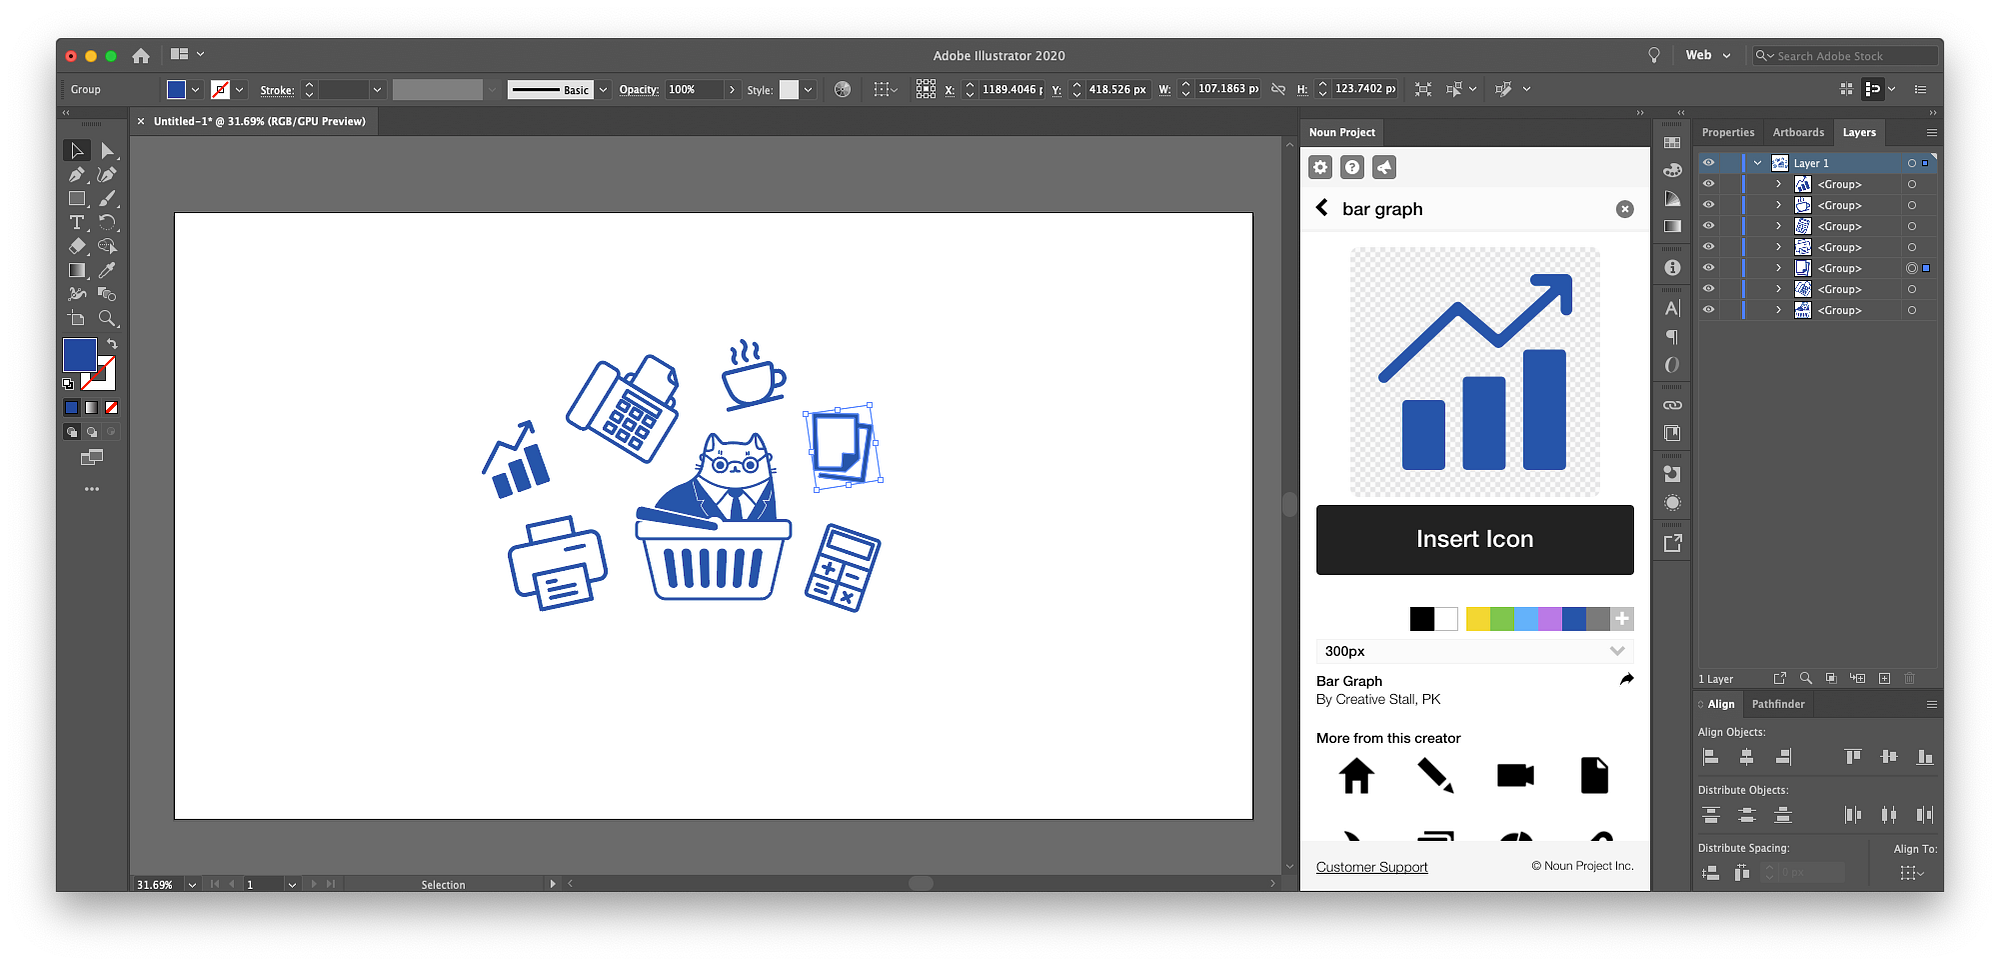
- You can insert as many additional icons onto your artboard as you want. I’ve decided to create a repeating pattern with a “Corporate Chic” theme, so I’m going to search for papers, a printer, a telephone, a coffee mug, and a calculator in the Noun Project Add-In window.
- Using the selection tool “V” (the black cursor in your tool bar), click and drag your icons into new positions. You can also scale them up and down by grabbing a corner of their bounding box and holding “Shift” while you click and drag to ensure proportional resizing. Hovering your cursor just beyond the bounding box corners, you’ll see the cursor turn into a rotational arrow — click and drag this around to rotate the icon clockwise or counterclockwise.
It’s not difficult to create a pattern in Illustrator, but it’s a highly intuitive and visual art–it’s all about how you fill the negative spaces and achieve balance. Start spacing out and arranging your cluster of icons in a way that feels cohesive to you — then you can fine tune it in the next step once you make the pattern.
Make your pattern… and experiment!
Using the selection tool “V,” drag your cursor across all icons on the artboard to select them.
Then go to Object > Pattern > Make to make the repeating pattern. Here’s where it gets super fun.
You’ll see a pop-up window alerting you that the pattern you’ve made will be saved under your swatches (Window > Swatches), meaning it can ultimately behave as a “fill” just like any solid color.
In this pattern-making view, you’ll see your artwork become a repeating pattern based on how the icons are arrayed within the highlighted rectangle frame (or “tile”) on your artboard.
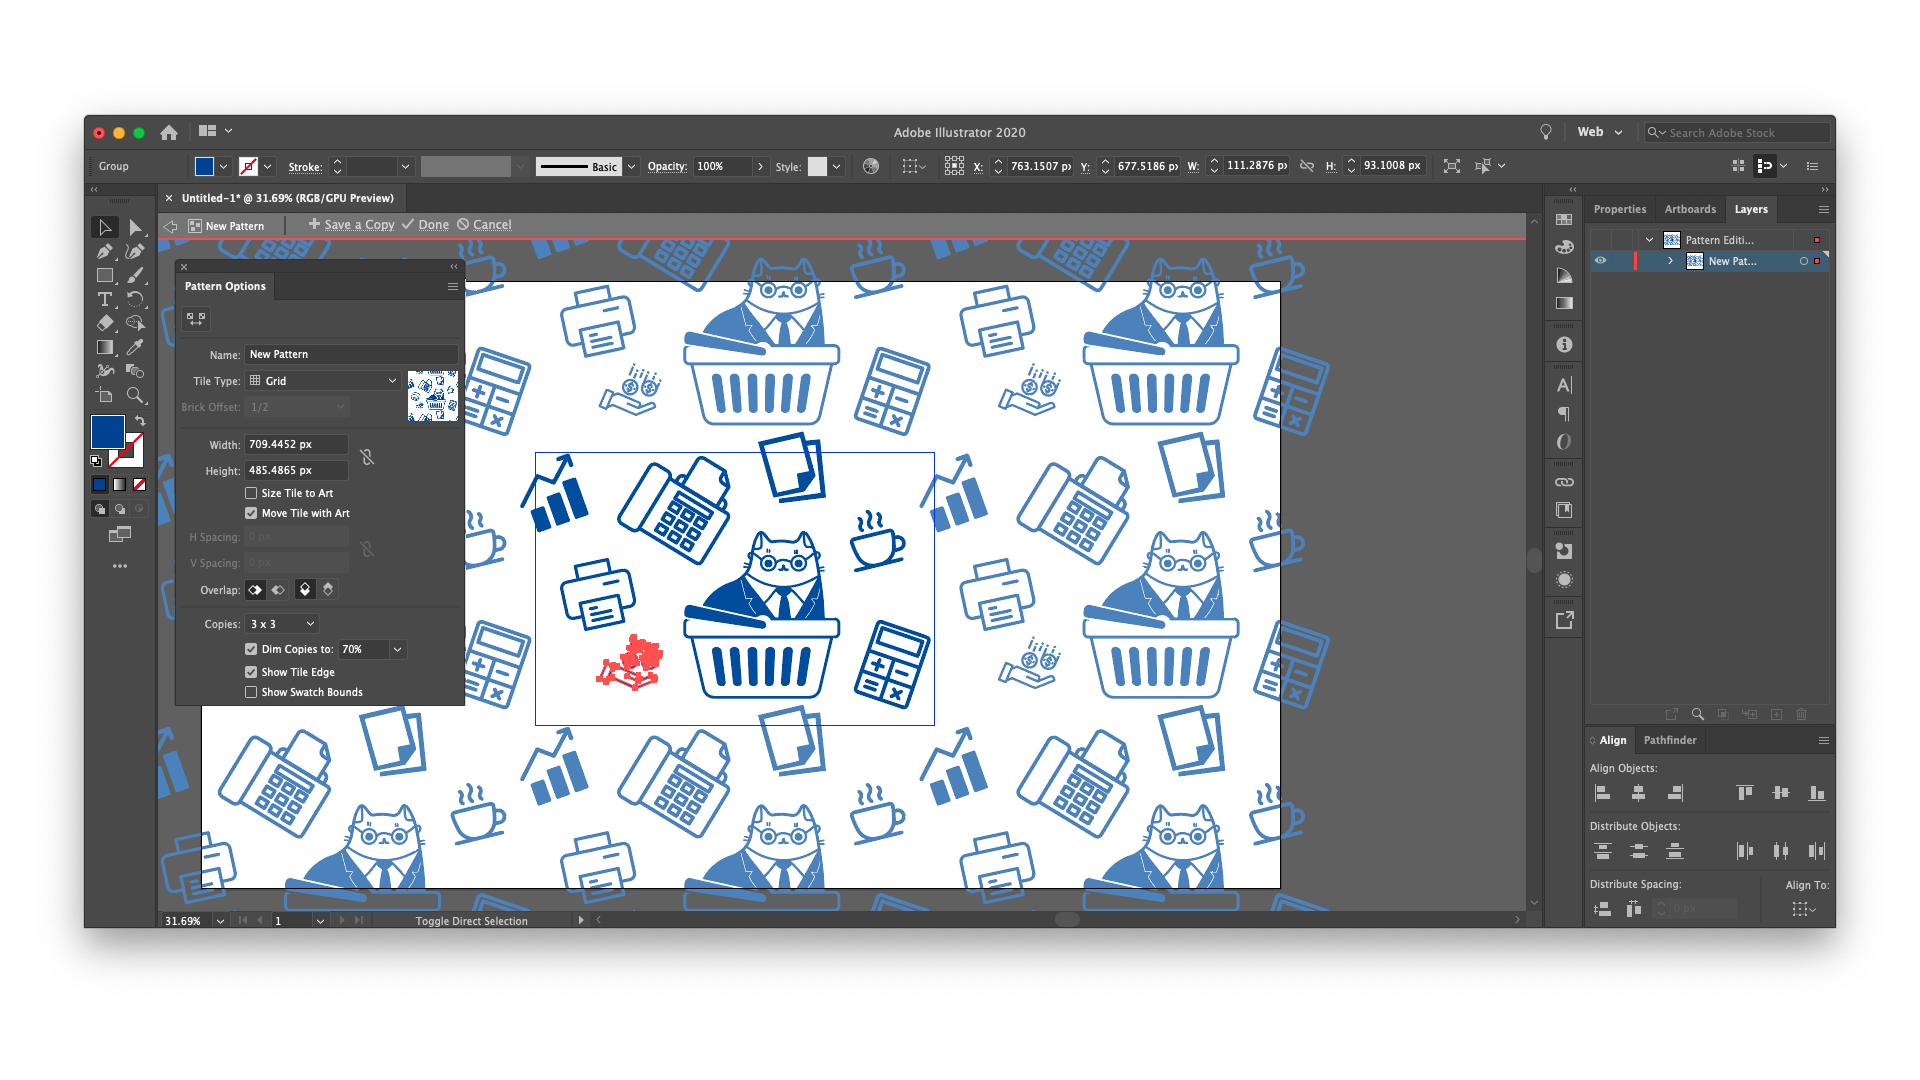
In the Pattern Options window that pops up, you’ll see some key formatting options that dictate how your pattern tile appears and repeats.
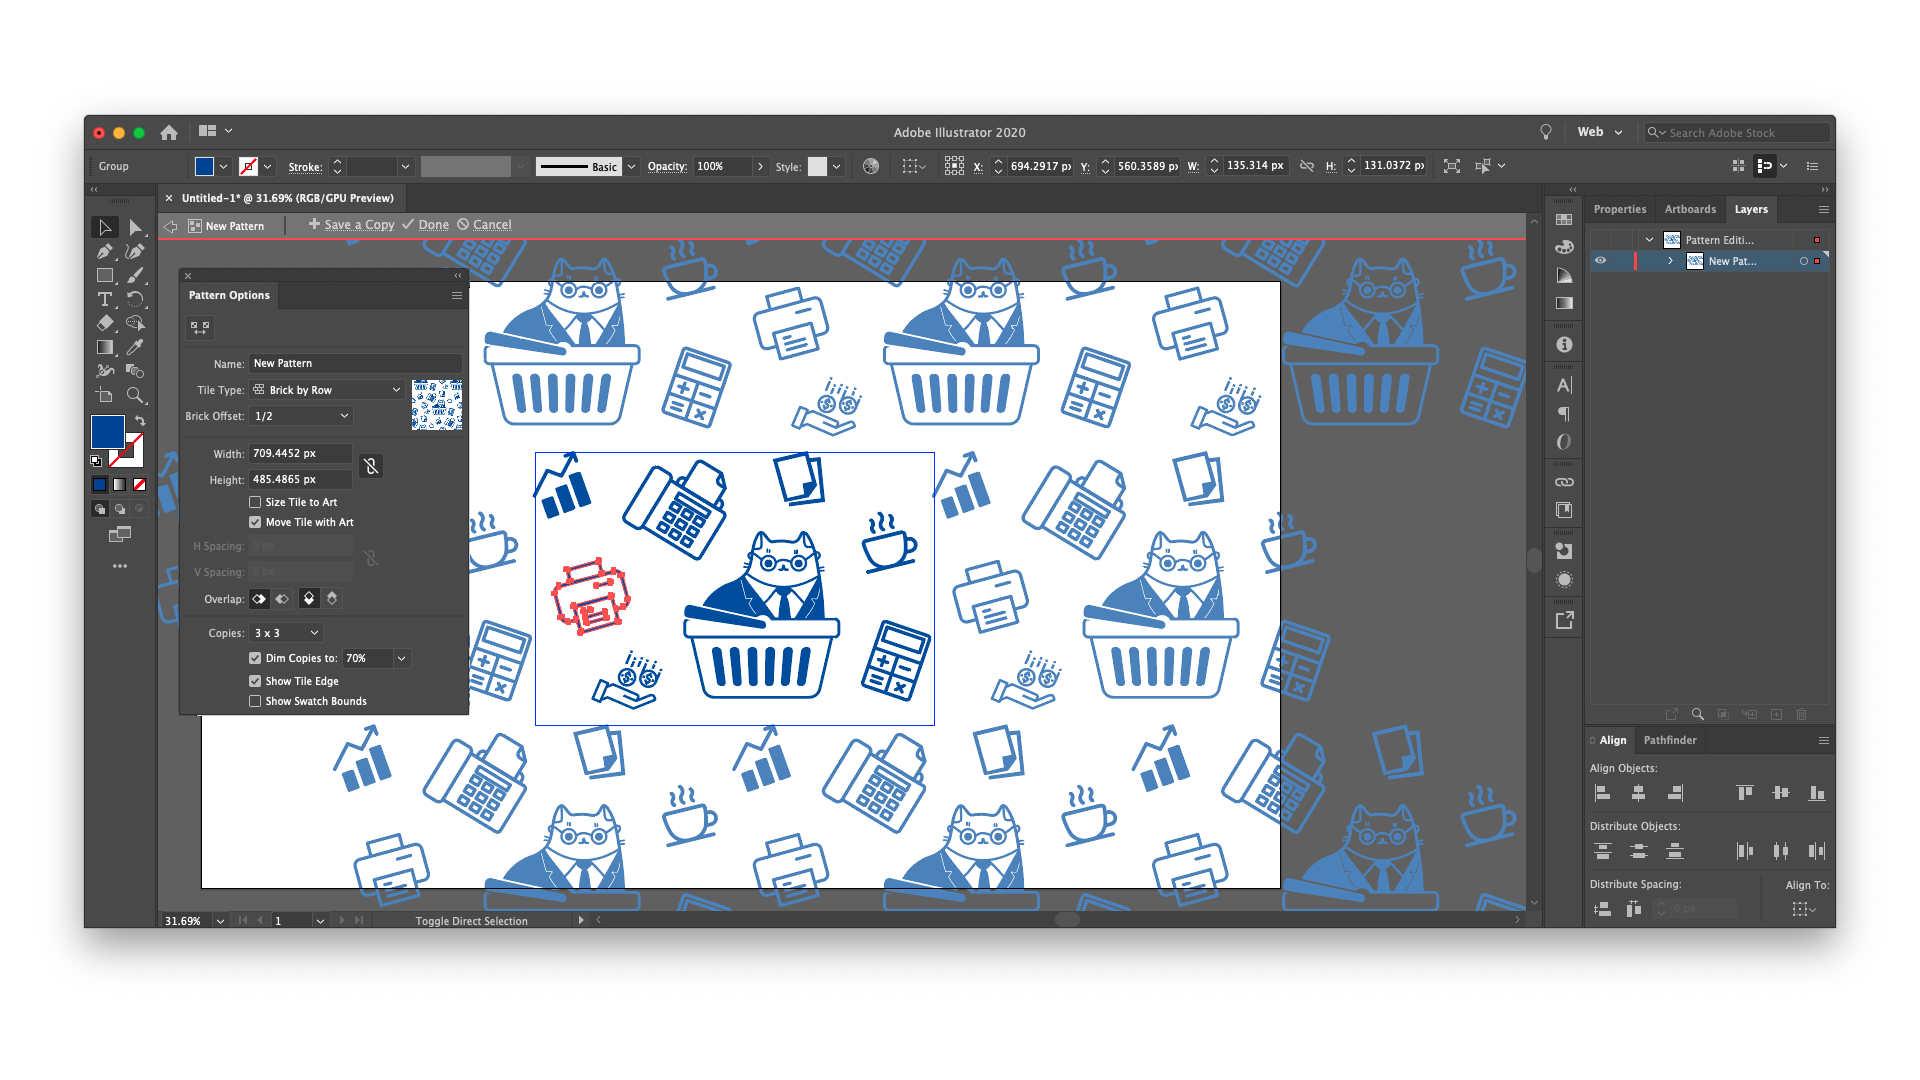
- First, pay attention to “Tile Type.” The drop-down menu of options includes “Grid” (the elements will repeat with a straight vertical and horizontal stacking pattern) or “Brick by Row” (tile will repeat horizontally, but additional rows on top and beneath will be staggered). In the latter case, you can play with “Brick Offset” to dictate how much these stacked rows are staggered from the baseline, as shown below.
- Above all, this is the time to experiment and see what works best for your pattern. “Hex” tile options allow for tighter spacing by using a stackable hexagon shape instead of a rectangular tile.
- You can also play with the “Width” and “Height” field (use arrow keys, and shift+arrow keys to adjust pixel values) to see how it changes the spacing by extending or contracting your tile. Again, how you create a pattern in Illustrator is highly optical and intuitive, so just keep playing!
As you explore these Pattern Options, you may start to see some overlap or spacing issues between your icons. The great thing about this view is you can continue using the selection tool “V” to move and scale the icons within your tile as much as necessary.

As you go, keep looking for that visual balance and make sure the icons are arrayed to fill in any white space. You can continue inserting new Noun Project icons, right in the pattern editing view. Also observe how you can drag an icon across or even beyond the highlighted boundary of your central tile, and it will maintain its form and continue repeating, so that you can continue optically spacing it out.
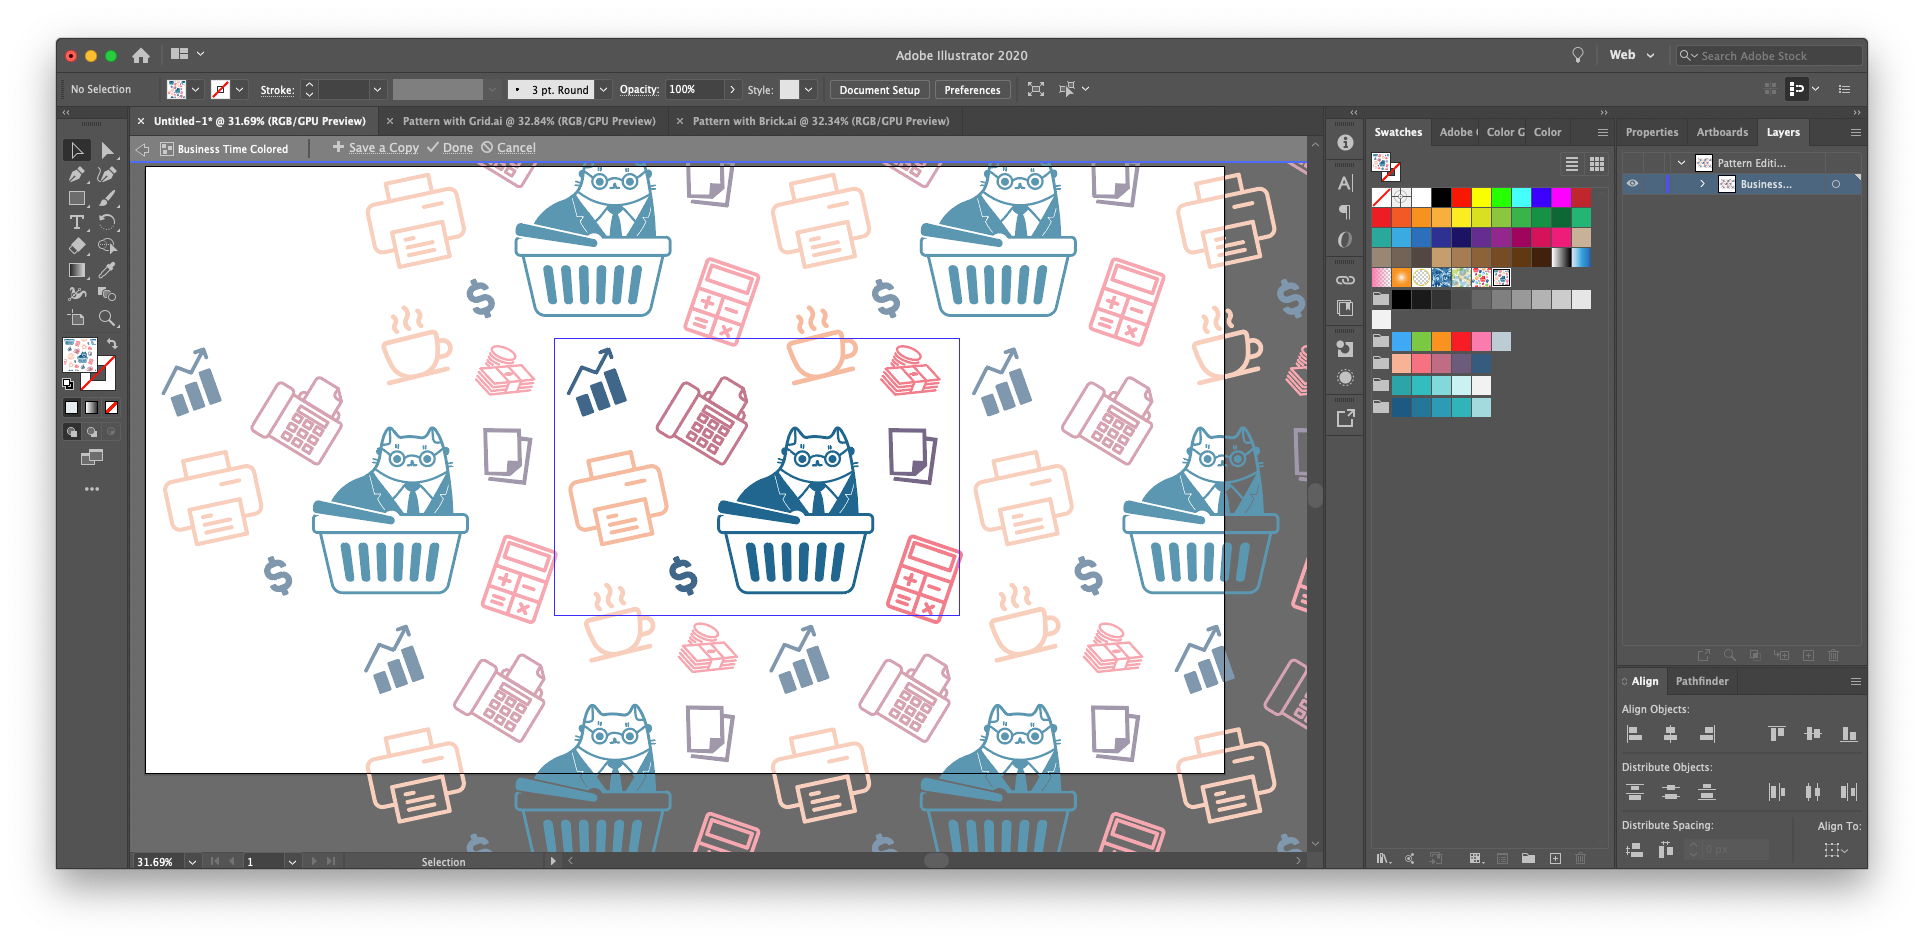
Save your pattern and use it like a fill
Once you’re generally happy with this pattern (you can always return to edit it later), give your pattern a name at the top of the same Pattern Options window. Along the top of your artboard (within the gray banner that shows you current “Isolation Mode” controls), click “Done.”
Great! Now, where did your pattern go?
It’s automatically saved in your swatches (Window > Swatches), right at the end of your first group of default colors.
Let’s see it in action:
First, clean up your artboard clutter by hiding the original icons you used. In your layers panel (Window > Layers), click the eyeball icon next to the layer where all your icons are listed to make them all invisible. You can create a new layer above it with the “+” icon at the bottom of the Layers panel to start working with new shapes.
Make a rectangle to span your whole artboard (click M, and drag from one corner to the opposite corner). Traditionally, you can fill your rectangle with any solid color you click in your Swatches, but let’s go ahead and click our pattern swatch to see it fill the shape! Nice.

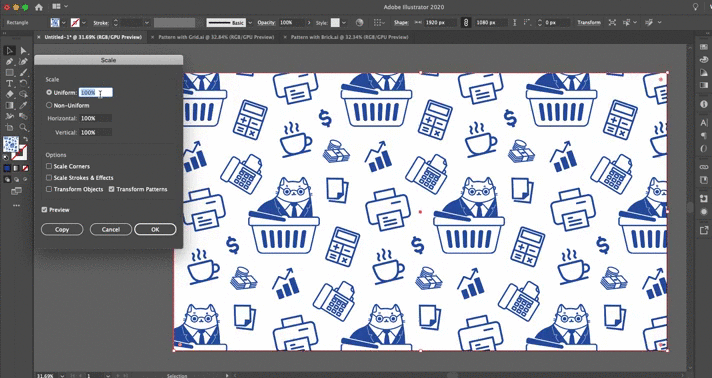
What if I want to zoom out and see more repetitions of my pattern?
Maybe you’re not seeing as much of the repeating pattern as you’d like. Let’s look at how to scale the pattern within your rectangle to zoom in or out of it.
- With the rectangle selected with “V,” Go to Object > Transform > Scale.
- Under “Options,” make sure the box that says “Transform Pattern” is checked, but not the box that says “Transform Object.” This will leave the size of your overall rectangle intact, but let you zoom in or out of the pattern.
- Make sure “Preview” is also selected so you can see the changes immediately.
- At the top, under “Scale,” click the percentage next to “Uniform” and use your up and down arrow keys to change the scale — you’ll see it zooming in and out. Hold “shift” along with the arrows to more quickly scroll by multiples of 10%.
- When you’ve done the amount of scaling you’d like, click “OK.”
Can I change my pattern’s color?
You can make any adjustments to your pattern you’d like — just double click the pattern from your Swatches panel to bring up the pattern editing mode again.
You can select the entire cluster of icons (using “V”), or any single icon you want, and simply click a different color within the swatches or color window.
Want to set this pattern against a different background color? Make an additional layer to fill with a new rectangle, and select a new fill color.
Hint: A great way to quickly use a pleasing, harmonious color scheme is to use Adobe Color Themes (Window > Color Themes). Under the “Explore” button, you can browse some of the most popular color palettes contributed by fellow designers, or do a keyword search using theme ideas like “sunset” or “forest” to find inspiration.
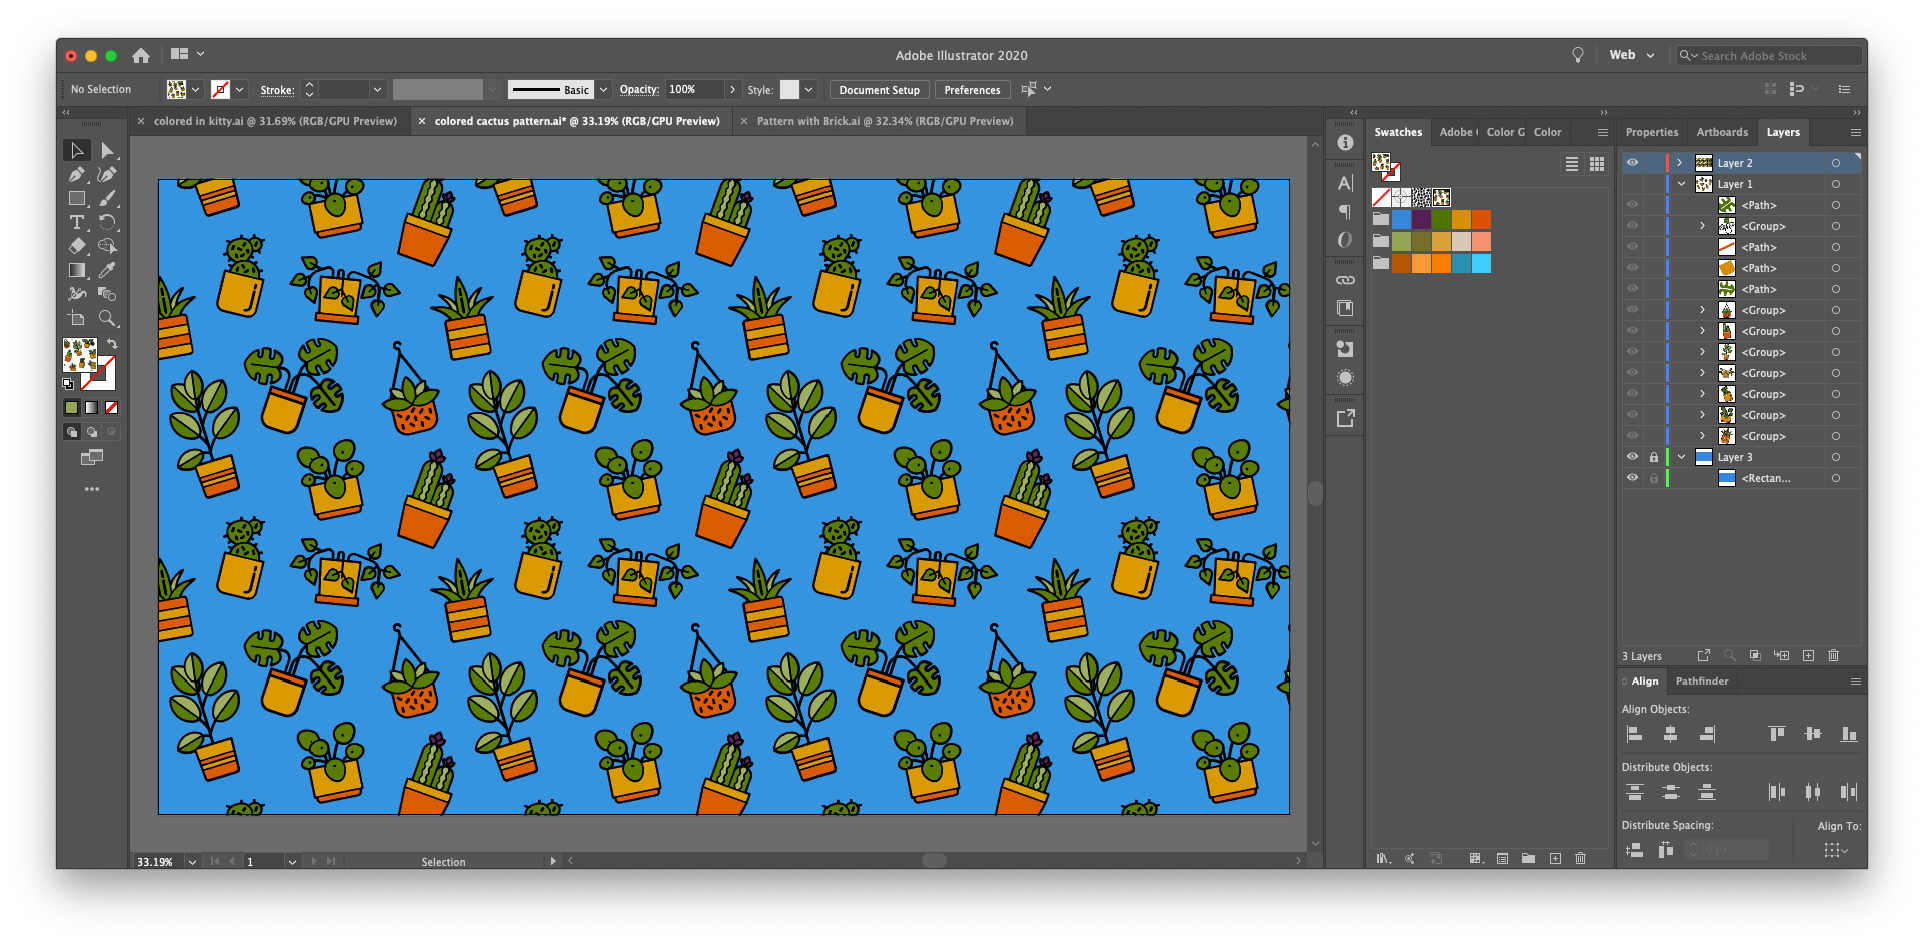
Bonus: Fill each icon with multiple colors using Live Paint
We’ve previously written a tutorial about using Live Paint (K) to color in the white spaces of an icon and add multiple colors for a more detailed and eye-catching effect. You can supercharge your patterns with the same method.
In short:
- Select an icon on your artboard with “V” and make sure that it’s a compound path, as that’s the only way it can be colored in (Object > Compound Path > Make)
- With the object still selected, hit “K” for Live Paint (or go to Object > Live Paint > Make)
- With the Live Paint tool (K) selected, you can hover over the white spaces within your icon and you’ll see their borders highlighted. Simply click inside to manually color each space, using colors from your Swatches window (this is where it’s especially great to use Color Themes).
- Once you’ve colored the icons how you’d like, select each one and make a new pattern just as before.
Note: You cannot Live Paint an icon within the pattern editing view — painting must be done before you make the pattern.

Prefer Photoshop?
Read our How to Create a Pattern in Photoshop tutorial.
Want to try a free online alternative?
Some free online pattern making sites exist, such as Patterninja. Patterninja has the advantage of being simple and intuitive to use, as you can upload (or drag and drop) your Noun Project SVG icon files from your computer, and manually resize, rotate, color, and move the icons across your canvas.