

Our Easter icon collections are as abundant as Spring itself, with rabbits, chicks, eggs and other designs to help you ring in the holiday. If you’ve got your eye on a particular icon or pattern you love, you can easily print it out at home, and with a bit of clear varnish and a touch of Noun Project magic, stamp it right onto your eggs.
Let’s hop to it!
You will need:
- As many eggs as you want to stamp (hard-boiled are best)
- Mod Podge OR 3 parts PVA glue to 1 part water (PVA glue is a white glue such as Elmer’s Glue-All — not school glue, as that’s too diluted)
- A bowl of water
- A paintbrush (we’re only using washable substances, so feel free to use your fingers instead!)
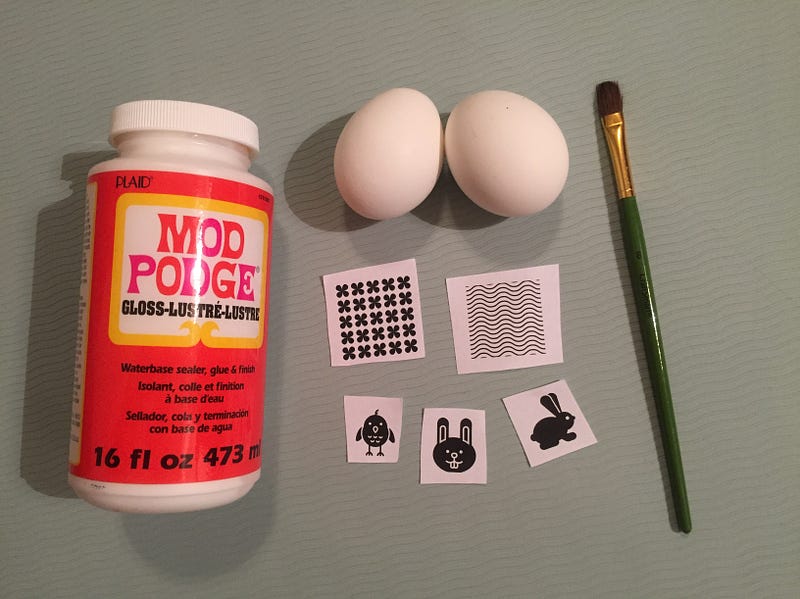
The supplies couldn’t be simpler — white glue mixed with water will also do if you don’t have Mod Podge.
Print Your Favorite Icons
First, find your favorite icons to use on Noun Project. Since eggs are small, you’ll want something bold that isn’t too ornate. A nice, centered bunny or chick would work well, but don’t be afraid to experiment (even with patterns) and see what works!
Next, you’ll want to prepare your icons for printing. Starting a new Google Doc is an easy way to go, and free on any web browser. You can download icons right from the Noun Project website, or as a NounPro subscriber, enjoy the convenience of opening the Noun Project Mac App and simply search, drag, and drop icons directly into the doc.
As a NounPro subscriber, you can also customize the size of your icons (we’d recommend 150 px for this smaller-scale project), and even select a color of your choice in the lower lefthand corner of the app.
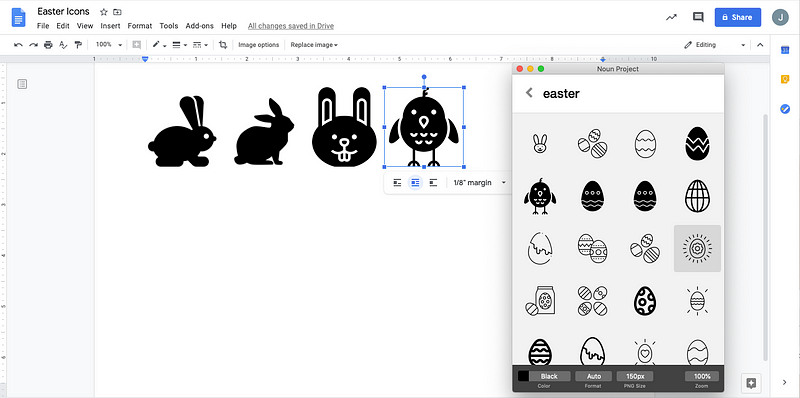
With the Noun Project Mac App, you can simply search for “Easter,” hit enter, and drag and drop your icons directly into your doc.
Tip: In your Google Doc, keep an eye on those rulers along the top and side. If you don’t see them, go to View > Show Rulers. An egg’s surface is only a couple inches across — to be safe, shrink the icons down (hold Shift as you click and drag the corners to scale it evenly) to around 1 1/2 inches across.
Another pro tip: Clicking an icon and selecting “Wrap Text” — the blue highlighted icon in the image above — will give you more freedom of movement to rearrange your icons on the page manually.
Once you’ve got a selection of icons you’d like to try, print the page. Regular, non-glossy printer paper will do just fine.
Transfer the Designs Onto Your Egg
Now for the exciting part:
- Cut out each of your icons to check that they’ll fit on the egg’s surface (and yes, applying a flat sheet to a round surface can be tricky — we opted for smaller icons in this example)
- The front (inked) side should be coated with glue, as it will go face-down onto the eggs in order to transfer. Whether you apply the glue to the egg itself or the face of the icon, just make sure it’s enough to fully coat the area of contact.
- Press the icon down onto the egg evenly to ensure flatness and get rid of any air bubbles. Pressing from the center outwards will help guide the edges around the curved surface. Apply a thin coat of extra glue to the back of the icon as well, to fully “seal” it on like decoupage, but not so much that it would run and drip.
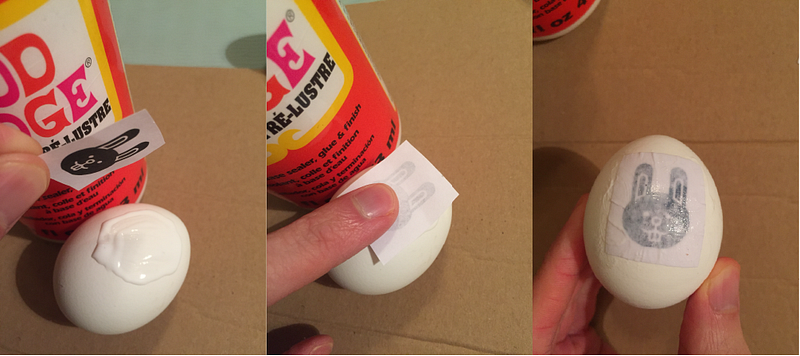
You can apply the Mod Podge/glue to the icon itself or the egg. Just make sure the front and back are wet enough to seal it flat against the surface. Avoid wrinkles where you can.
Let It Dry, Then Soak It
- Let the egg air-dry for at least half an hour (or speed it up with a hairdryer, gently!). It should feel crisp to the touch with no dampness.
- Next, drop your egg back into a bowl of water for at least five minutes. This is what allows the paper to start lifting away while leaving the inky part behind.
Peeling: The *Slightly* Tricky Part
If there’s one part of the process that requires just a bit more finesse, it’s peeling off just enough of the wet paper pulp to leave your design intact (if you’ve ever done a temporary tattoo, this is a similar concept, but handle this even more gently!)
- Start by peeling away at the edges, moving outward, using your fingernail. The paper should be wet enough that it rolls off without “tugging” at other parts of the design.
- You may find that you can actually peel off the topmost layer of paper, as in the image below. Great! You can then continue to rub your finger delicately over it to make sure that the little white rolls of paper pulp keep peeling away. If you see too much black (or other color) coming up, ease off. This is where you may need to get your own feel for the peel and give it a couple tries.
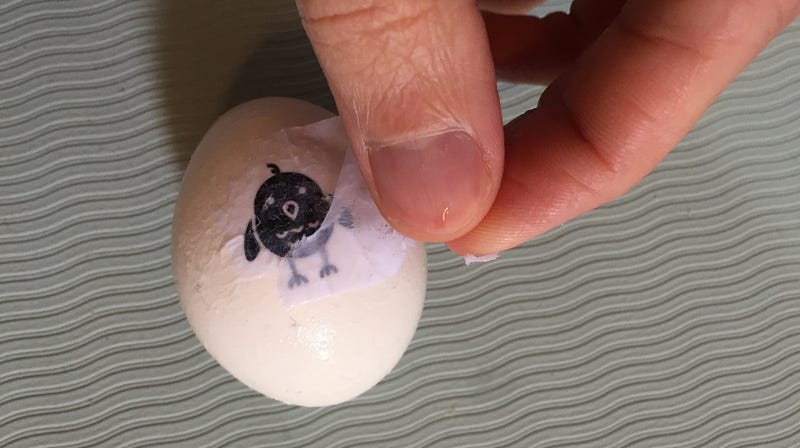
Doing this gently is key — just peel away the excess white parts and wrinkles, rubbing only the topmost pulpy layer and using your fingernail to scrape outwards from the edge of the design.
Starting to Look Good? GOOD!
Once you’re just about there, it only takes the slightest couple of extra wipes to get any extra pulpiness off.
Want more shine? Dab a bit of vegetable oil on your finger, and then dab it in a thin layer over the surface — it can help add gloss and richer visual contrast.
How did yours turn out?! Share your pictures with us on social and tag us!

Not bad for a first try, and adding vegetable oil helps boost the sheen and contrast.

